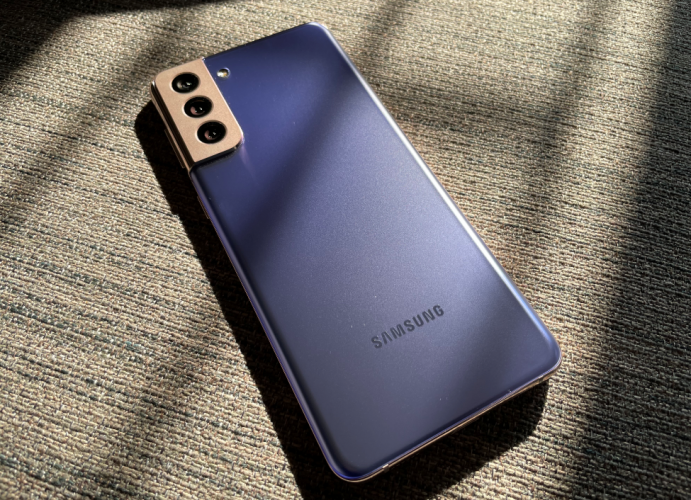
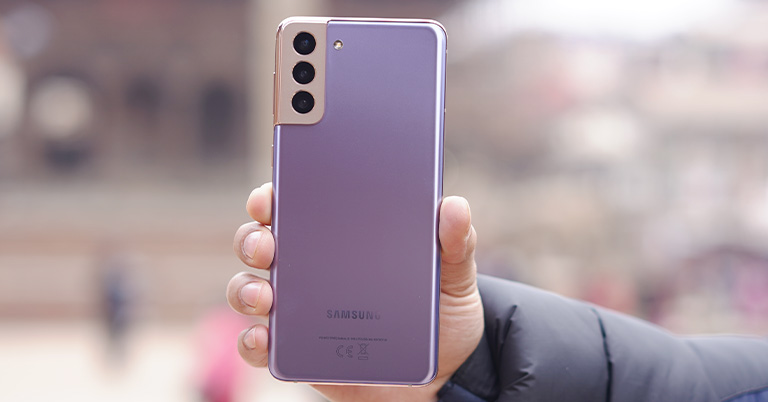
Hey there techies! Do you own a Samsung Galaxy S21 Plus? Well, accidents happen, and our beloved gadgets sometimes get cracked or damaged screens. But do not worry! This blog post will describe the Samsung Galaxy S21 Plus screen replacement process. It is super easy! Let us start and make your phone look new again!
Things to Know
This manual works for SM-G996B/DS (international). Some models have an extra cable on the side. If the frame is bent, replace it before installing the new screen to avoid damage. Be careful with puffy batteries. Ensure your device’s battery is less than 25% before taking it apart. Fixing it this way makes it less likely for the battery to catch fire.
Note: Learn to change the screen without taking out the frame and motherboard. If you need a new phone screen, you might get a new frame with the screen already on it. If so, the Samsung S21 Ultra screen replacement will be different. Make sure you have the correct part before using this guide. Put new seals, or they will not be waterproof. Get new glue for the back glass and screen before starting.
Step-By-Step Replacement Guide
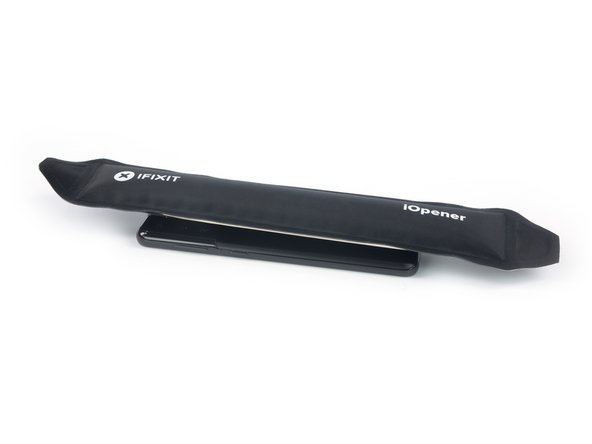
 I. Preheat the Back Cover
- To remove the back cover, use an iOpener. Put it on the back cover for three minutes to soften the adhesive.
- You can use a heat gun, hair dryer, or hot plate to dry your phone. But, be careful not to use too much heat because it can damage the display and battery inside.
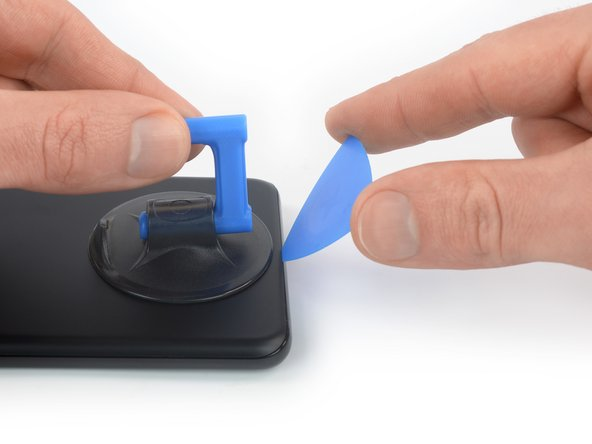
 II. Lift the Back Cover
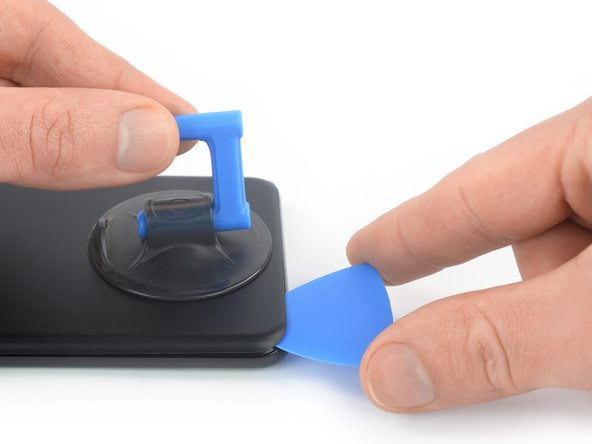
- Attach a suction handle near the edge at the bottom of the back cover.
- If the back of your phone case is broken, the suction cup might not work. You can use strong tape to lift it or use superglue to keep the suction handle in place. Wait for it to dry before continuing.
- Use the suction handle to lift the back cover slightly and make a gap between it and the frame.
 III. Put in an Opening Pick
- If you cannot make a gap, heat the glue softer.
- Create a gap at the bottom edge and corners to put an opening to pick into your phone. Then, open your phone with the pick underneath the corners and edges.
 IV. Cut the Adhesive
- If the glue is difficult to cut, it may have cooled down. To warm up your iOpener, put it in the microwave for up to three minutes.
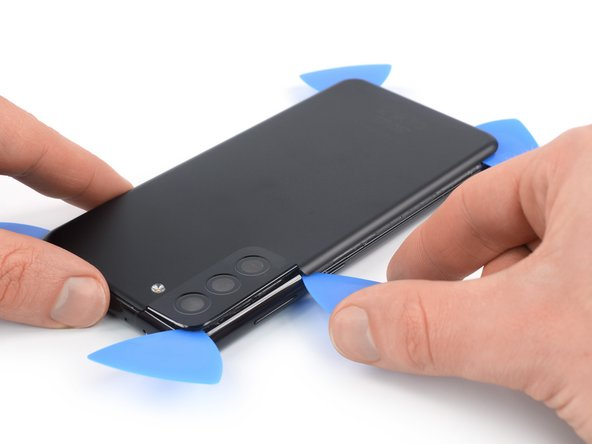
- To remove your phone’s screen, slide a tool called the opening pick along the left and top edges. Then, move it to the bottom left and right corners to cut the adhesive.
- Keep the gaping picks in all the places to avoid the adhesive from resealing.
 V. Be Careful
- If you want to avoid hurting or making the camera dirty, only use the edge of the opening pick (which should be around 4–5 millimeters) when you cut near the camera assembly.
- When you cut close to the power button, only put the tip of the opening pick (around 3–4 millimeters) to prevent harm to the volume and power button flex cable.
VI. Detach the Back Cover
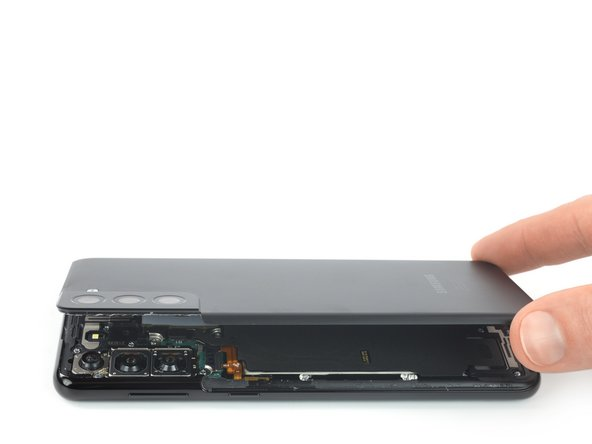
- Take off the back cover.
- When closing your phone, it is a good idea to turn it on and check that everything works properly. Before you continue working, make sure to turn off your phone completely.
- Use tweezers or your fingertips to remove any sticky pieces. To remove sticky stuff, use strong alcohol (90% or more) and wipe it away.
 VII. Cut the Adhesive
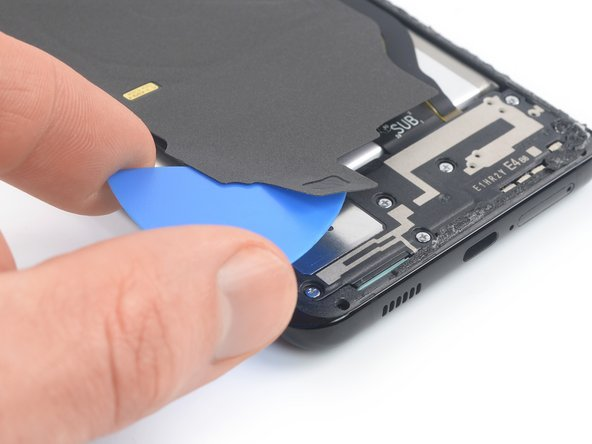
- Be careful not to hit or break the battery with your tool. If the battery gets punctured or bent, it can leak harmful chemicals or even cause a fire.
- Slide an opening pick under the NFC antenna and the charging coil assembly’s bottom end.
- Gently move the opening pick at the bottom of the assembly to detach and remove the battery and loudspeaker.
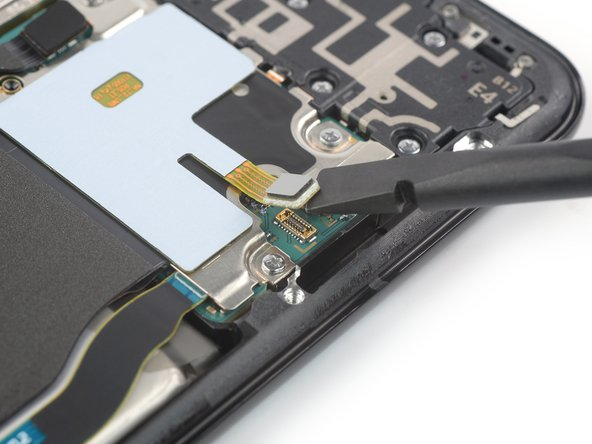
 VIII. Separate NFC Antenna & the Charging Coil
- For detaching the charging coil and NFC antenna, use a spudger tool.
- Pry the connector straight out of its socket.
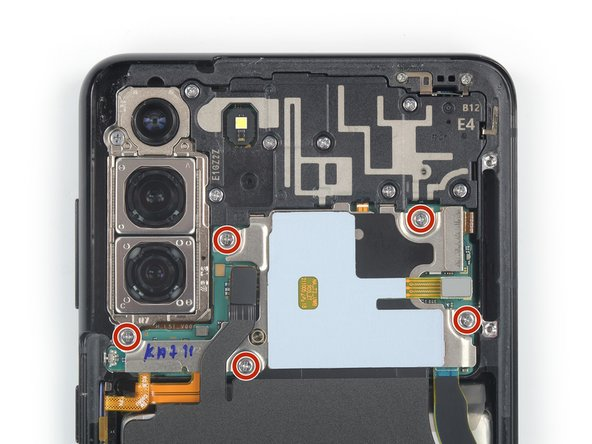
 IX. Disconnect the Charging Coil Screws & NFC Antenna
- Take a Phillips screwdriver and unscrew the five 3.9 mm screws holding the near-field communication antenna and charging coil installation.
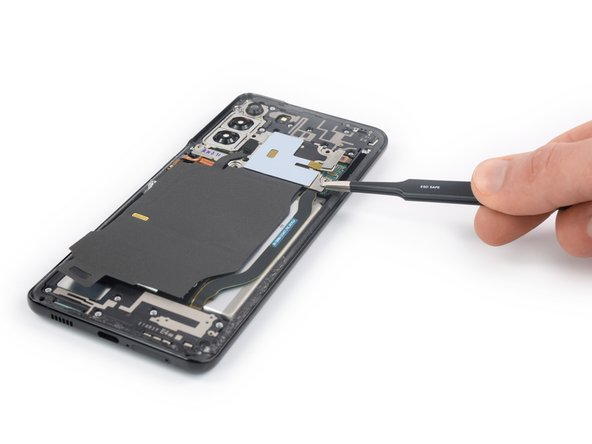
 X. Disconnect the Charging Coil & NFC Antenna.
- Take out the NFC antenna and charging coil carefully using tweezers or fingers.
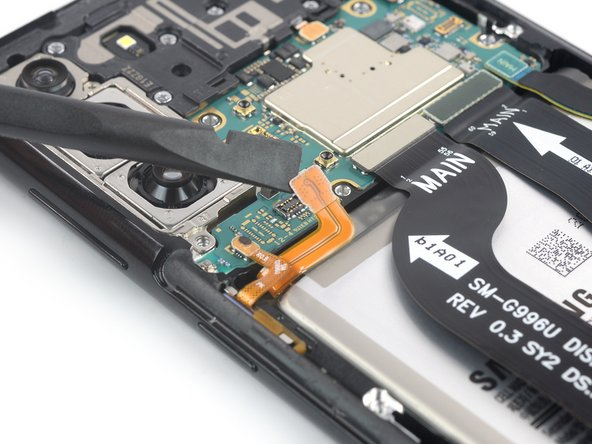
 XI. Remove the Battery Cable
- To take out the battery cable, use a spudger to pull the connector directly from its plug gently.
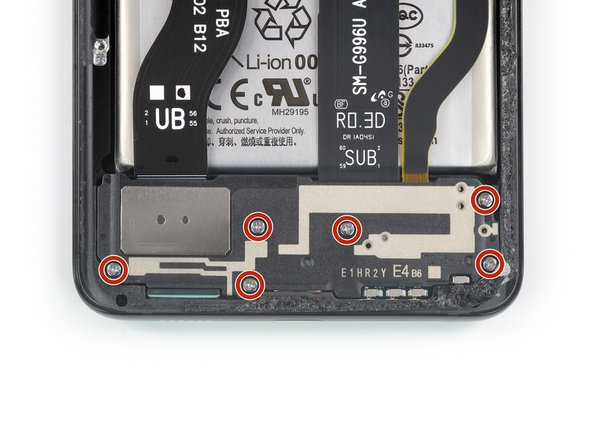
 XII. Loosen the Screws on the Speaker
- Take a Phillips screwdriver and use it to remove six screws that are 3.9 mm long. These screws hold the loudspeaker assembly in place.
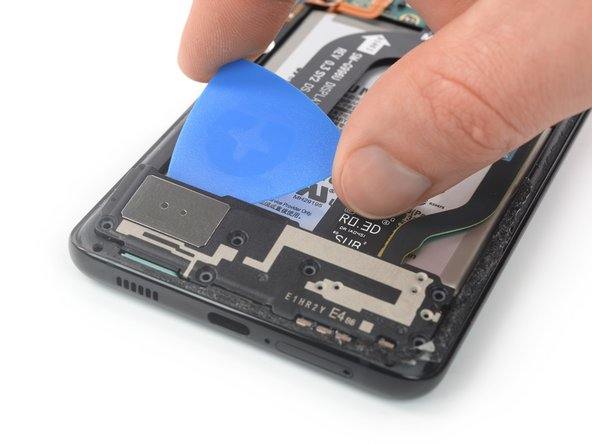
 XIII. Disassemble the Loudspeaker Unit
- Put a small tool between the top of the speaker and the frame.
- Lift the speaker by pushing it down with your opening tool.
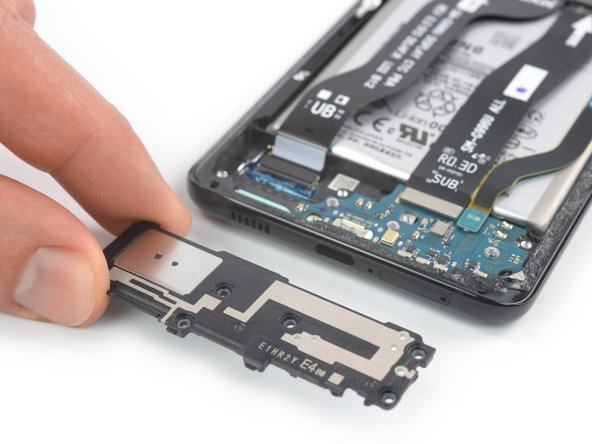
 XIV. Take Apart the Speaker’s Assembly
- Take out the speaker.
- When putting things back together, use new glue and clean the spots with alcohol that’s more than 90% pure.
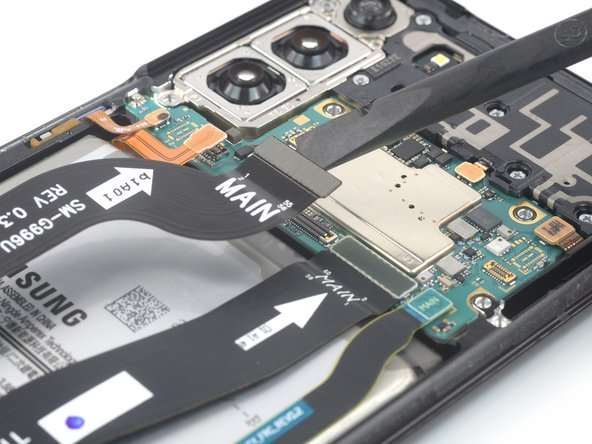
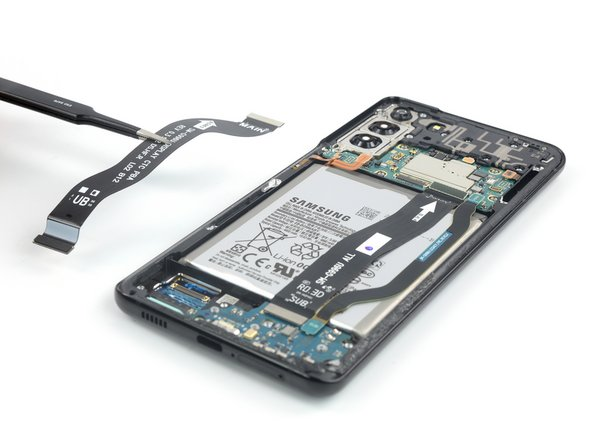
 XV. Detach the Display Flex Cable
- Use a spudger tool to unplug the display cable by gently pulling the top part out of its socket.
 XVI. Remove the Display Flex Cable
- To remove the display flex cable, gently use a spudger tool to pry the bottom connector straight out of its socket.
- Use your fingers or tweezers to take out the display flex cable gently.
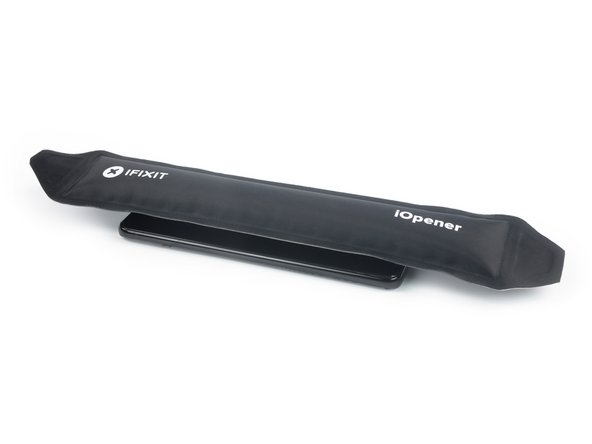
 XVII. Soften the Screen Adhesive
- Use a warm iOpener on the screen to pry away the sticky stuff underneath. Use the iOpener for 5 minutes.
- The glue on the Galaxy S21 Plus screen is strong. You might have to heat up and put on the iOpener a few times before taking off the screen.
- You can use a blow-dryer, heat gun, and hot plate to warm it up, but do not make it too hot.
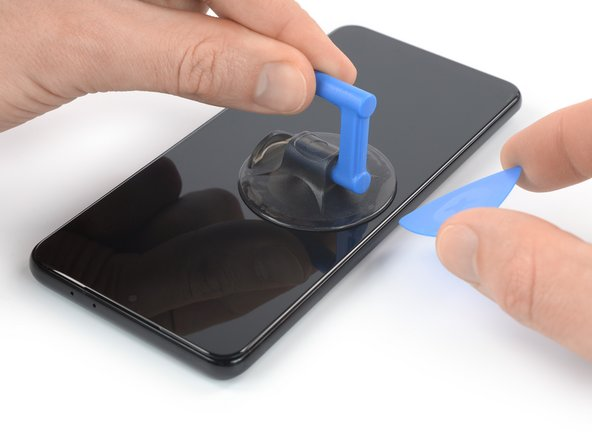
 XVIII. Use a Suction Handle
- Wait until the screen feels warm, then put a suction handle on the left side of the screen as near the edge as you can.
- If the display is broken, you can put clear tape to help the suction cup stick. You can use strong tape rather than a suction handle. If nothing else works, you can use superglue to attach the suction device to the screen.
- Use the suction device to lift the screen slightly away from the frame.
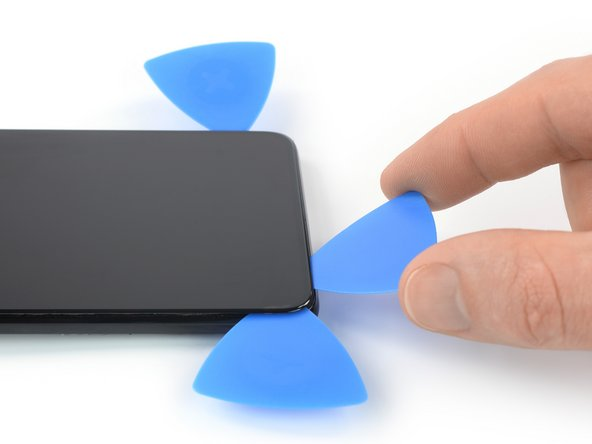
 XIX. Place Opening Pick
- Use a small tool to push between the frame and screen gently. Do this at the top left and right corners and on the bottom edge.
- Move the tool in the space to cut the sticky part.
- Do not cover these spots on your phone with the sticker so that it does not stick again.
 XX. Consider Precautions
- If the sticky stuff is tough to cut, it probably gets cold. Heat your heat gun or iOpener for about two minutes.
- Do not take off the screen completely yet. The screen is still stuck to the middle part with glue under the middle of the screen.
- Be careful when cutting near the front camera. Only put a bit of the opening pick (about 2–3 millimeters) so you do not hurt or mess up the camera.
- Use only the tip of the opening pick (about 4–5 millimeters) to avoid getting tangled with the fingerprint cable or tearing it by mistake.
XXI. Put in a Plastic Card
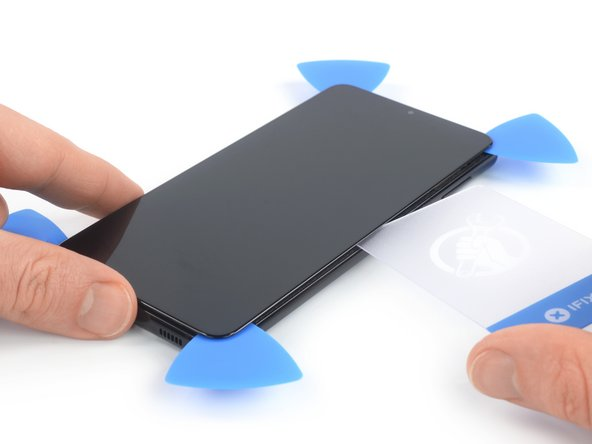
- To remove the Galaxy S21 Plus frame, you need to cut the sticky stuff under the middle of the screen.
- Put a plastic card between the middle and the screen on the long side of the phone.
- Utilize the plastic card to cut the sticky stuff under the screen.
 XXII. Detach the Screen
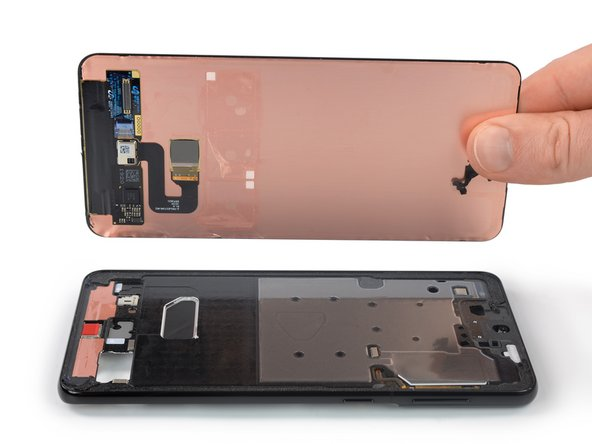
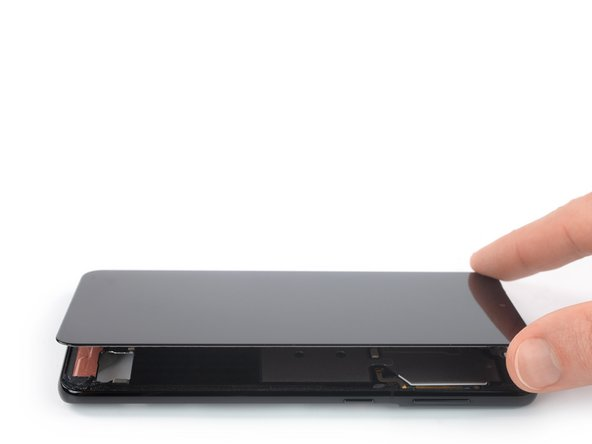
- Take away the screen.
- Check if your new part is the same as the old one. You might have to move some things from the old screen to the new one.
- Clean the area with the alcohol (>90%) and add new glue.
 XXIII. Winding Up
- First, power on your phone and check if it works after fixing it. Then, put in new glue and seal it again.
- Put your device back together by doing the steps in the opposite order.
- When you finish fixing it, put a special tape on the back of the new screen to keep it in place.
- Submit your old electronics to a certified recycler.
- Did the fix not work out? First, try to fix the problem yourself by following some simple steps. If that does not work, you can ask a professional for help.
 Conclusion
So we are done with the Samsung S21 Ultra screen replacement. You now know all the steps to take this task like an expert. When doing it, take your time, be careful, and follow the directions closely. If you have problems, get help from a professional. Best of luck with fixing your phone! We hope it looks as good as new soon!

 I. Preheat the Back Cover
 II. Lift the Back Cover
 III. Put in an Opening Pick
 IV. Cut the Adhesive
 V. Be Careful
 VII. Cut the Adhesive
 VIII. Separate NFC Antenna & the Charging Coil
 IX. Disconnect the Charging Coil Screws & NFC Antenna
 X. Disconnect the Charging Coil & NFC Antenna.
 XI. Remove the Battery Cable
 XII. Loosen the Screws on the Speaker
 XIII. Disassemble the Loudspeaker Unit
 XIV. Take Apart the Speaker’s Assembly
 XV. Detach the Display Flex Cable
 XVI. Remove the Display Flex Cable
 XVII. Soften the Screen Adhesive
 XVIII. Use a Suction Handle
 XIX. Place Opening Pick
 XX. Consider Precautions
 XXII. Detach the Screen
 XXIII. Winding Up
 Conclusion