Is your Samsung Galaxy S21 running out of battery faster than usual? Consider replacing the battery. In this detailed step-by-step guide, we will walk you through the process of replacing your Samsung Galaxy S21 battery. By following these easy to follow guidelines, you’ll be skillful to give your phone a new lease on life and enjoy longer battery performance.
Gather the Required Tools and Materials
Before we begin, it’s essential to have the necessary tools and materials on hand. Make sure you have the following :
- Replacement battery for Samsung Galaxy S21
- Phillips screwdriver
- A spudger or plastic opening tool
- Tweezers
- Adhesive strips or double-sided adhesive tape
- Heat gun or hair dryer
- Clean cloth or microfiber cloth
- Safety goggles and gloves (optional but recommended)
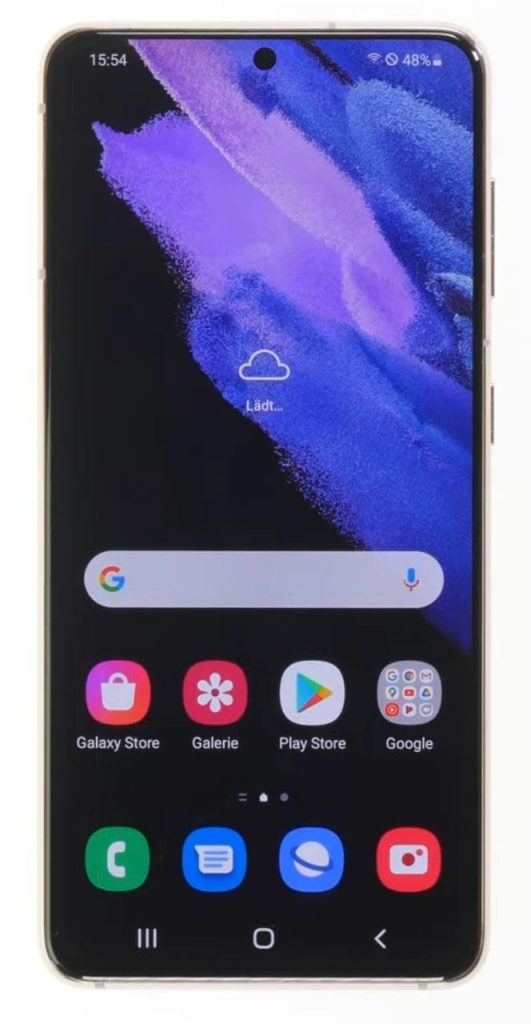
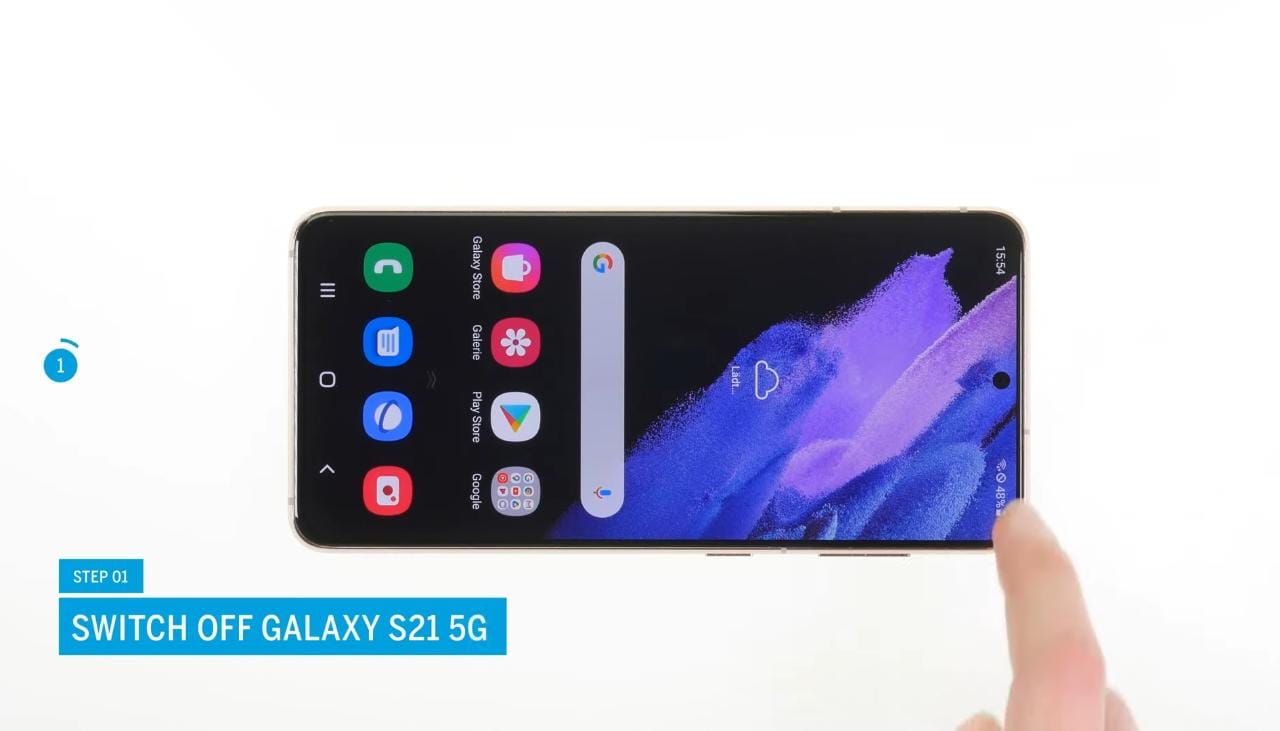
Step 1: Switch off your Galaxy S21
- Make sure your Samsung Galaxy is powered off before proceeding with the battery replacement.
- Locate the power button on your Samsung Galaxy S21 and press it down and hold it firmly, hold the button until the power off menu appears on the screen.
- Select “Power off” to shut down your Galaxy S21 completely.
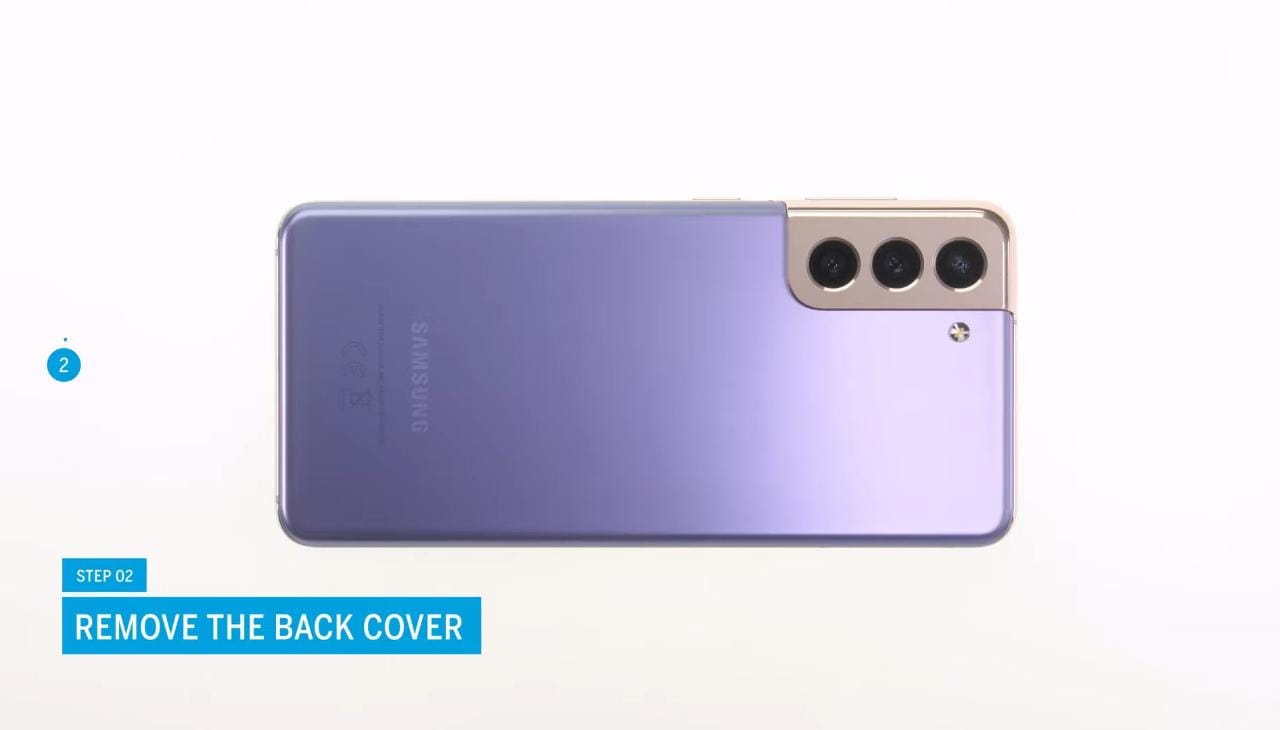
 Step 2: Remove the back cover
- Employ a plastic opening tool or your fingernail to avoid scratching or damaging the back cover.
- Start from the bottom and proceed with caution to prevent any unnecessary force.
- Take your time and ensure all the clips are released before fully removing the back cover.
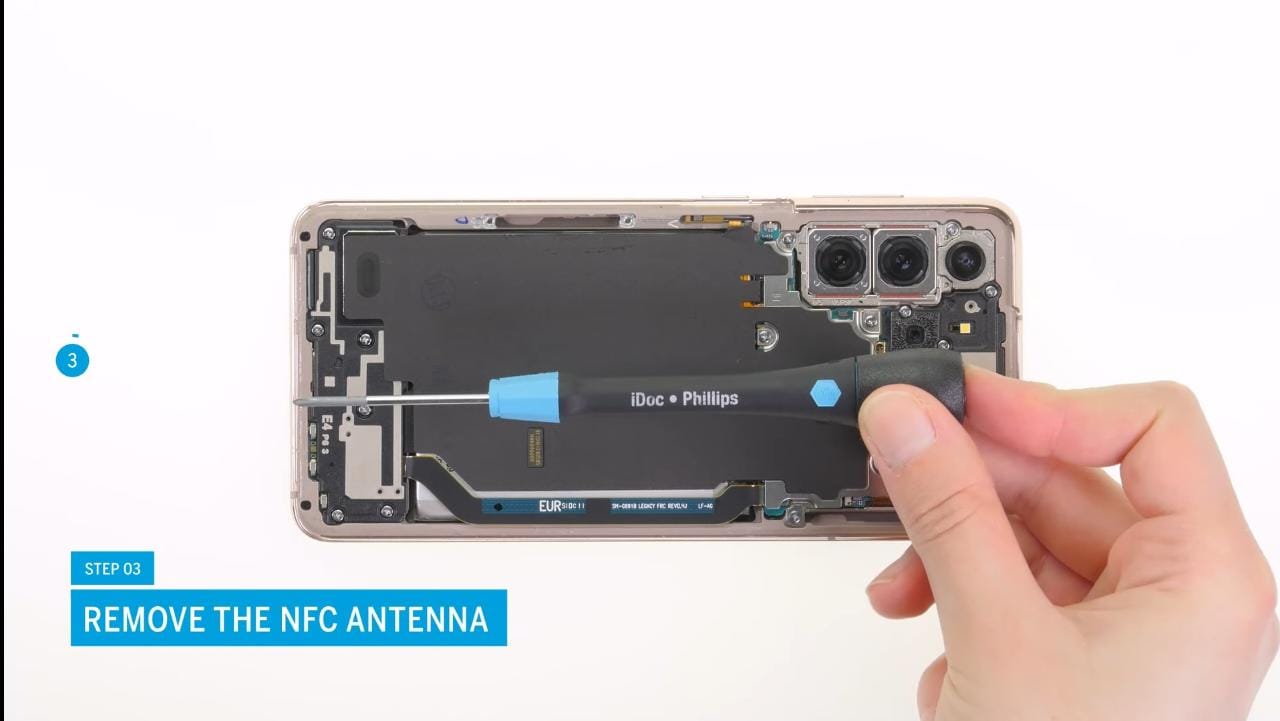
 Step 3: Remove the NFC antenna
- The NFC antenna helps facilitate contactless communication and payment features.
- Take care when lifting the connector to avoid any damage.
- Ensure that the NFC antenna connector is completely disconnected before proceeding further.
By disconnecting the NFC antenna, you will be able to proceed with the battery replacement process more effectively.
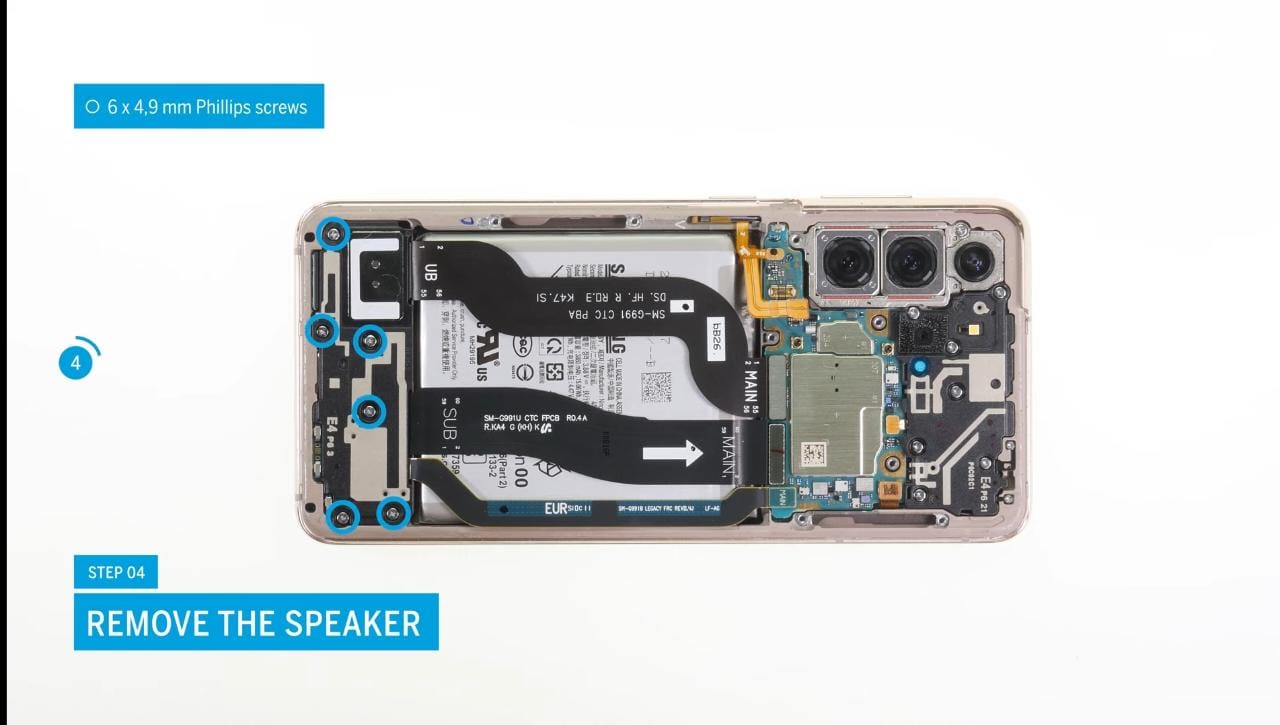
 Step 4: Remove the speaker
- The speaker provides audio output for various functions on your device.
- Exercise caution while lifting the speaker connector to avoid causing any damage.
- Ensure that the speaker connector is fully disconnected before proceeding.
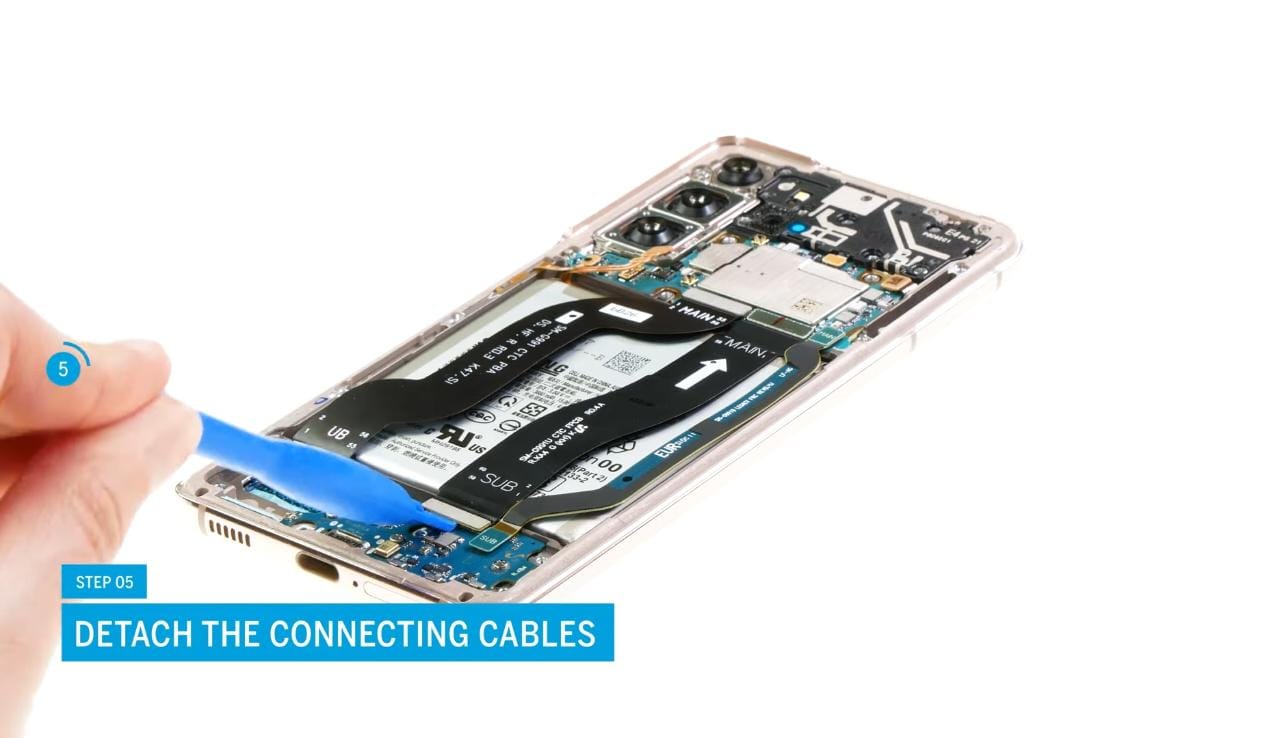
 Step 5: Detach the connecting cables
In this step, you will need to detach any remaining connecting cables. Follow these instructions:
- Connecting cables link various internal components of your Galaxy S21.
- Use a spudger or tweezers to carefully disconnect the cables to prevent damage.
- Take your time and ensure that each connecting cable is detached properly.
By detaching the connecting cables, you will be able to proceed with the battery replacement process smoothly and safely.
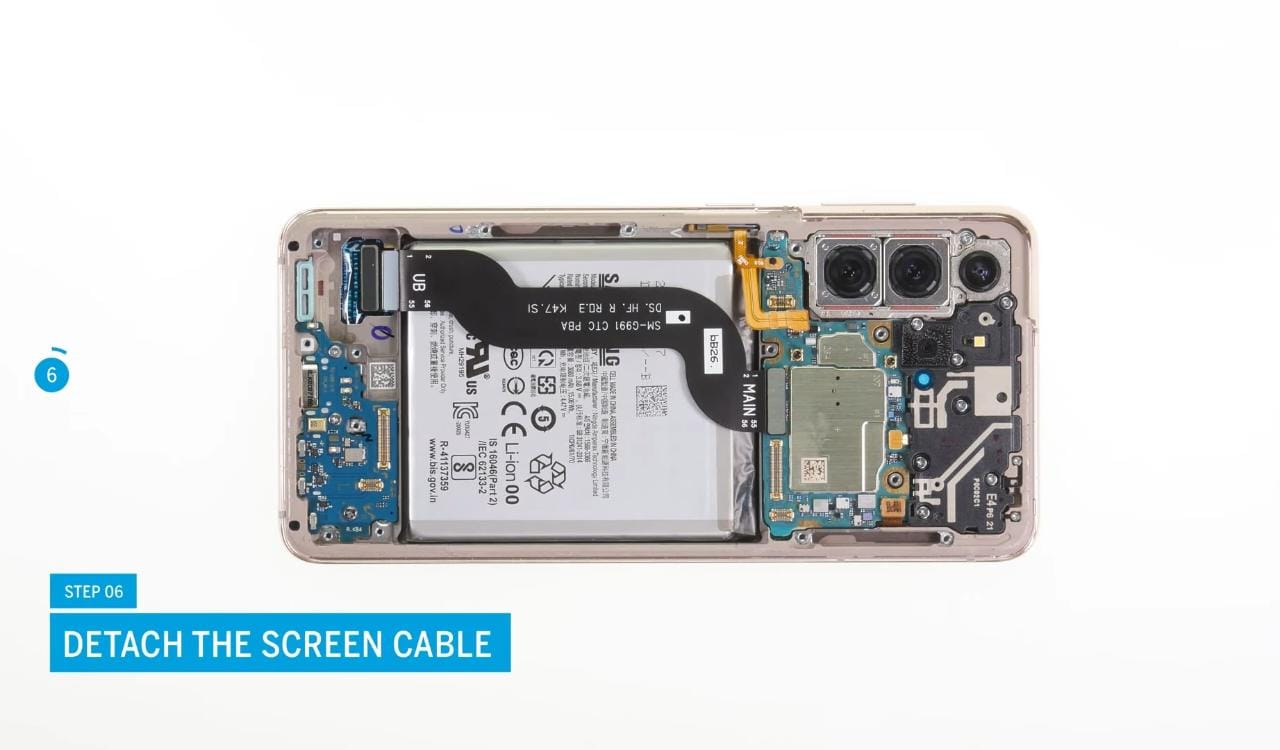
 Step 6: Detach the screen cable
You need to detach the screen cable to continue with the battery replacement. Follow these steps:
- Locate the screen cable connector, which is typically found near the top of the device.
- Gently lift the connector of the screen cable using a spudger or a pair of tweezers.
- Carefully disconnect the screen cable connector by lifting it away from the device.
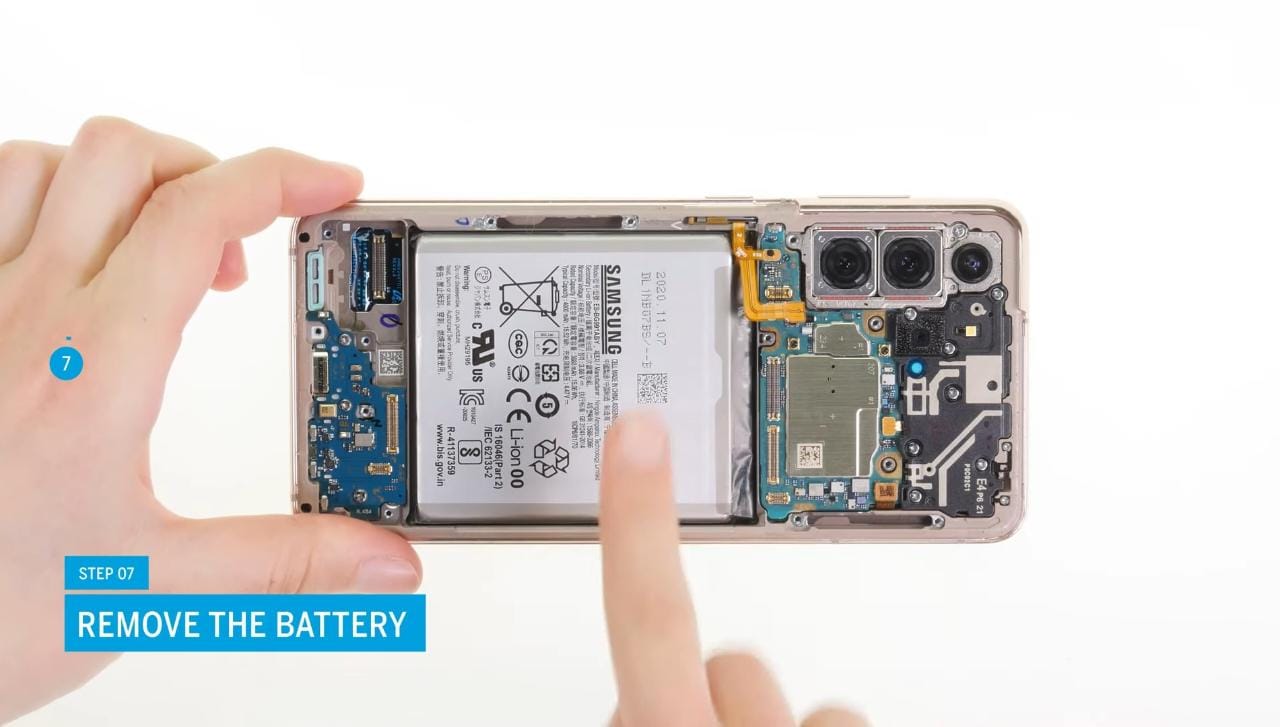
 Step 7: Remove the battery
Now it’s time to remove the battery from your Galaxy S21. Follow these steps carefully:
- Locate the battery, which is positioned in the center and towards the bottom of the device.
- Using a spudger or a pair of tweezers, gently lift the battery from its position.
- Ensure you exert gentle pressure and lift the battery slowly to prevent damage to surrounding components.
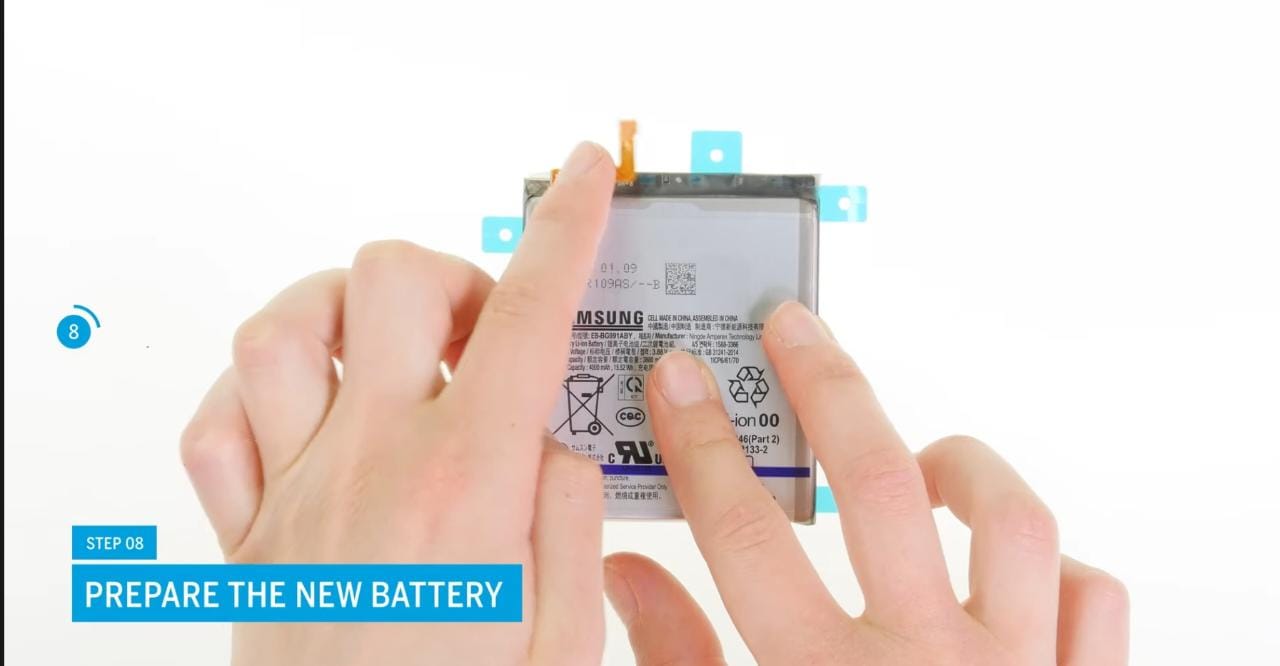
 Step 8: Prepare the new battery
Before installing the new battery, ensuring its compatibility with your Samsung Galaxy S21 model is crucial. Follow these steps to prepare the new battery:
- Take the new battery and verify that it is specifically designed for your Samsung Galaxy S21 model.
- Carefully examine the connections on the new battery, ensuring they match the corresponding connectors in your device.
- Check for any visible defects or damage on the new battery, such as bulges, leaks, or bent connectors.
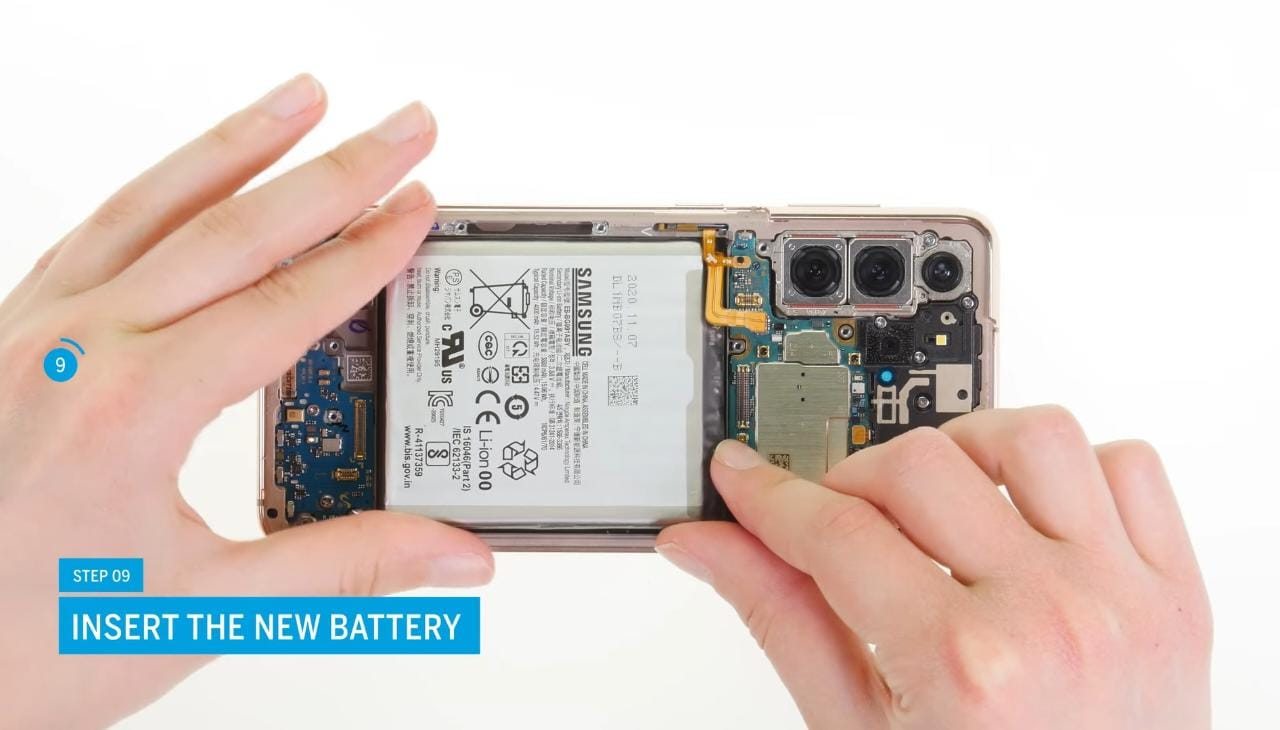
 Step 9: Insert the new battery
Now that you have prepared the new battery, it’s time to insert it into your Galaxy S21. Follow these steps to ensure a proper installation:
- Ensure the battery is aligned properly with the slot to avoid any damage to the connectors.
- Take your time and apply gentle pressure when inserting the battery to prevent any mishaps.
- Ensure the battery is securely seated in the slot before proceeding to the next step.
You are now progressing towards the final stage of restoring your device’s battery performance by inserting the new battery correctly.
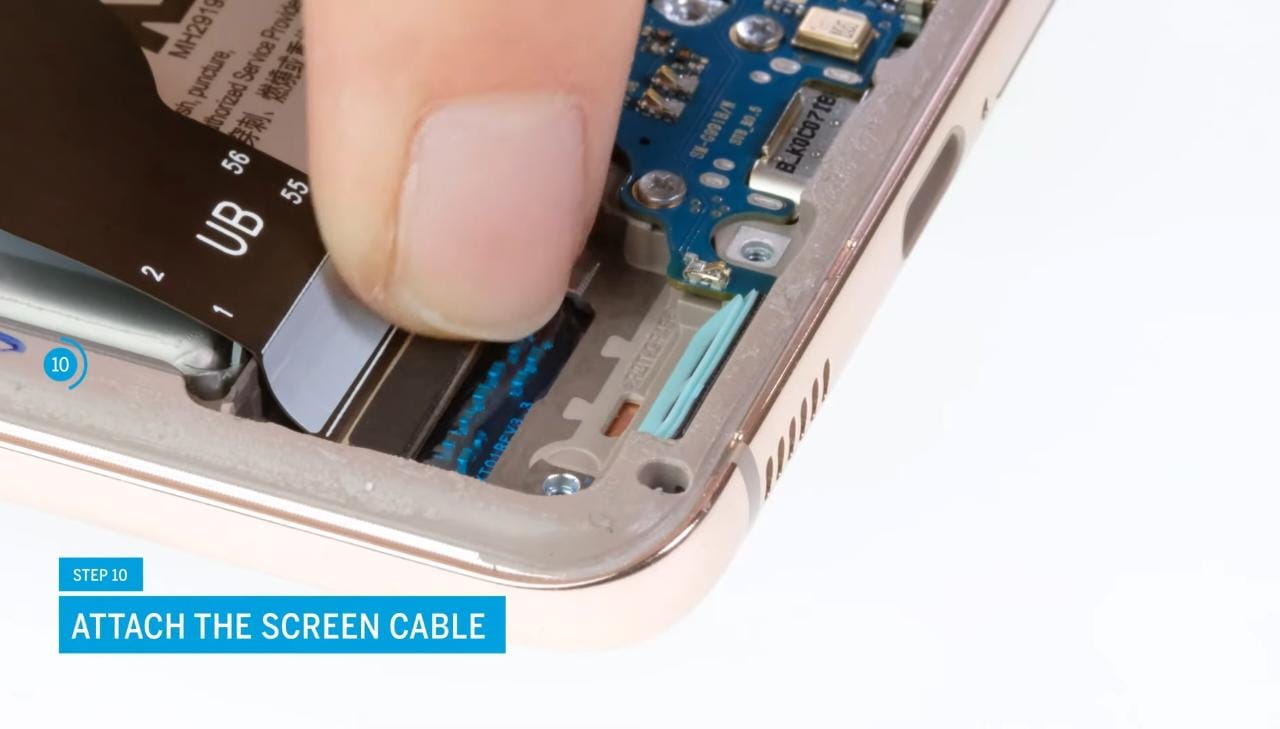
 Step 10: Attach the screen cable
To replace the battery, you need to reattach the screen cable. Follow these steps carefully:
- Take the screen cable connector and align it with its corresponding port on the device.
- Gently and firmly press the connector back into place, ensuring a secure connection.
- Be cautious not to apply excessive force while attaching the screen cable.
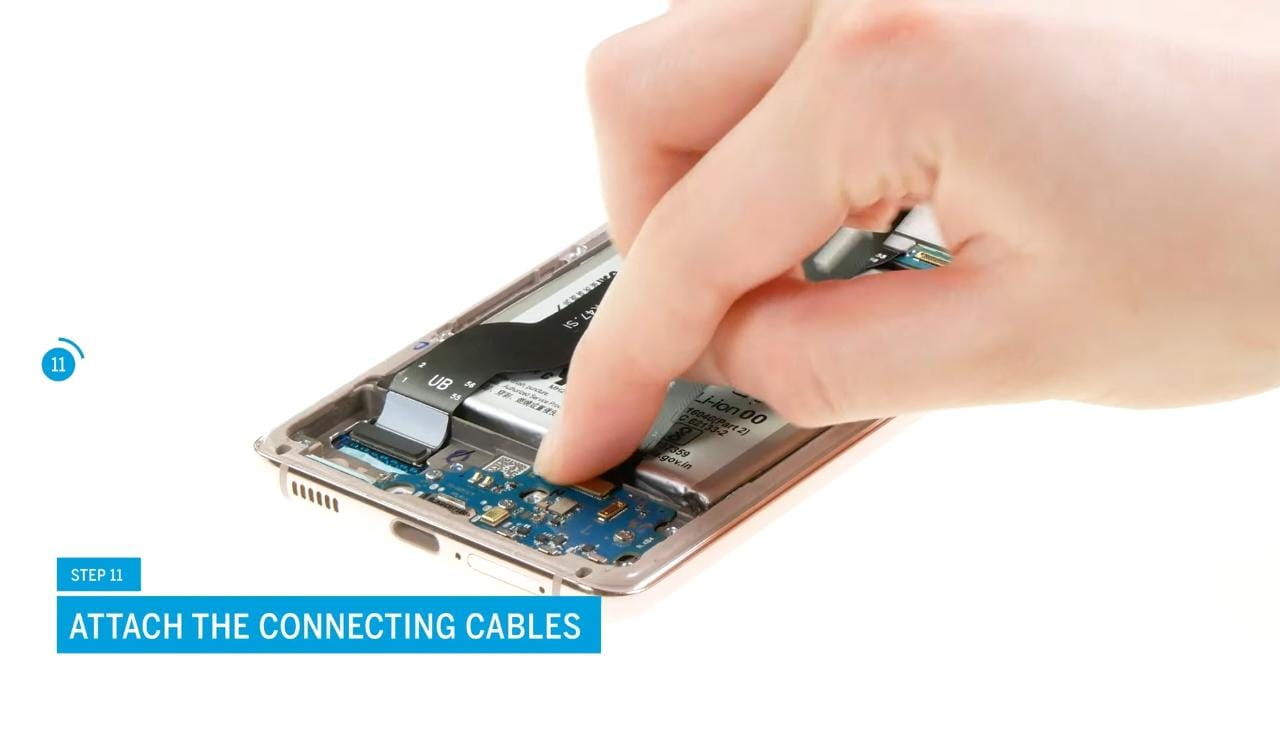
 Step 11: Attach the connecting cables
In this step, you will reattach any other connecting cables that were detached earlier. Follow these steps carefully:
- Take the connecting cables that were previously detached during the battery replacement process.
- Align each cable connector with its corresponding port on the device.
- Slowly and carefully insert each connector into its respective port, ensuring a proper fit.
- Gently press down on the connectors to secure them in place.
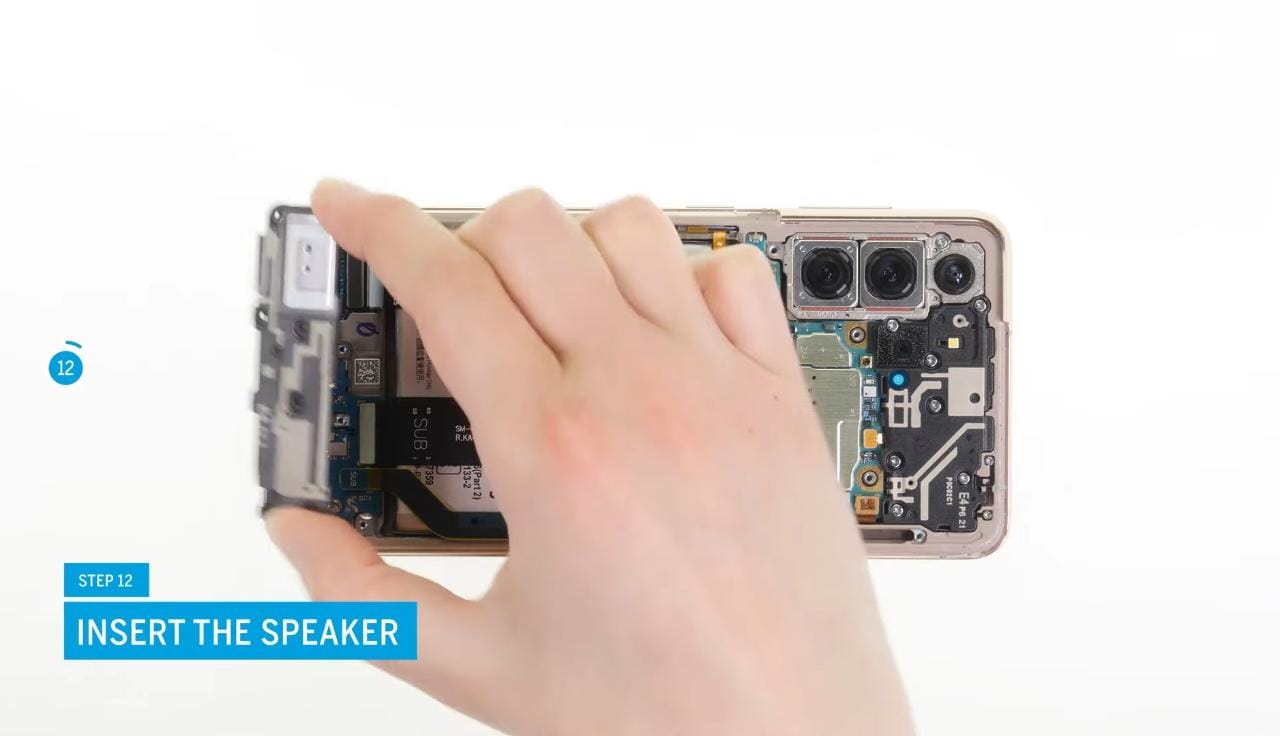
 Step 12: Insert the speaker
Now it’s time to insert the speaker back into its original position. Follow these steps:
- Take the speaker and align it with its designated location in your Galaxy S21.
- Carefully position the speaker and ensure it is properly aligned with the screw holes or guides.
- Once aligned, reconnect the speaker connector by inserting it securely into its corresponding port.
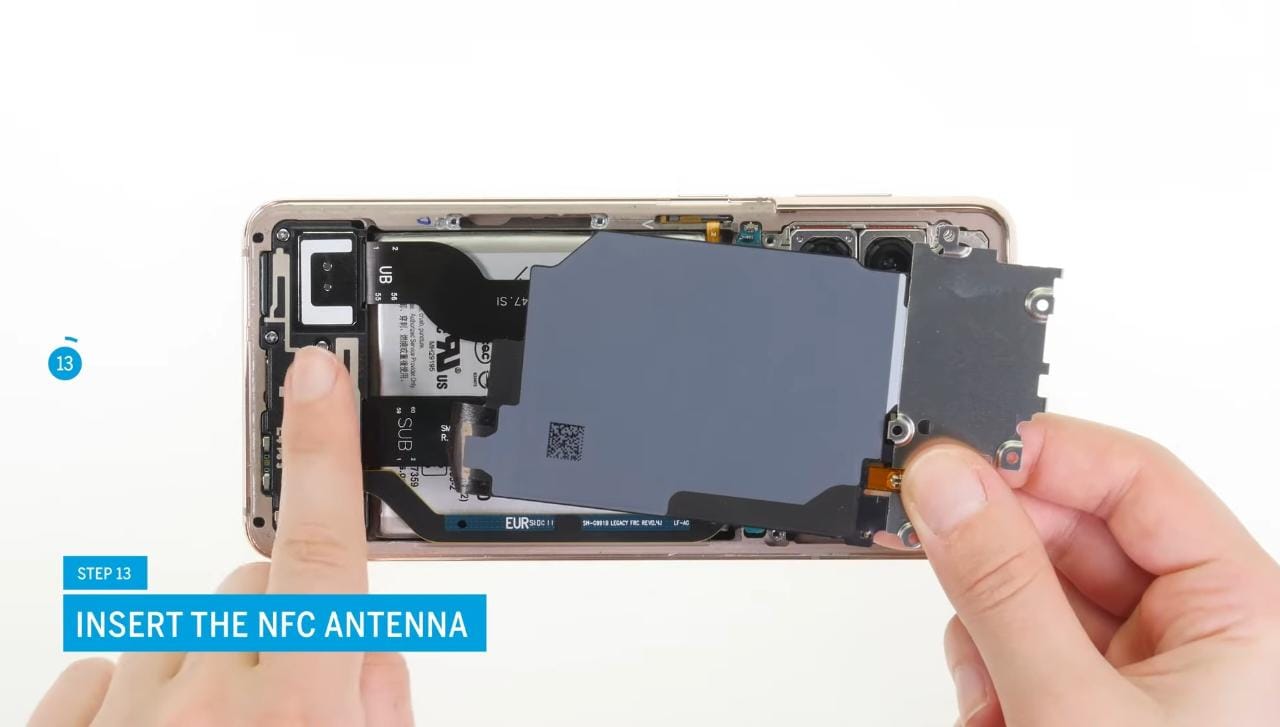
 Step 13: Insert the NFC antenna
To ensure the proper functioning of NFC features, you need to reconnect the NFC antenna. Follow these steps:
- Take the NFC antenna and locate its designated position near the battery or as indicated in your device.
- Align the connector of the NFC antenna with its corresponding port.
- Gently press the connector back into place, ensuring a secure and proper connection.
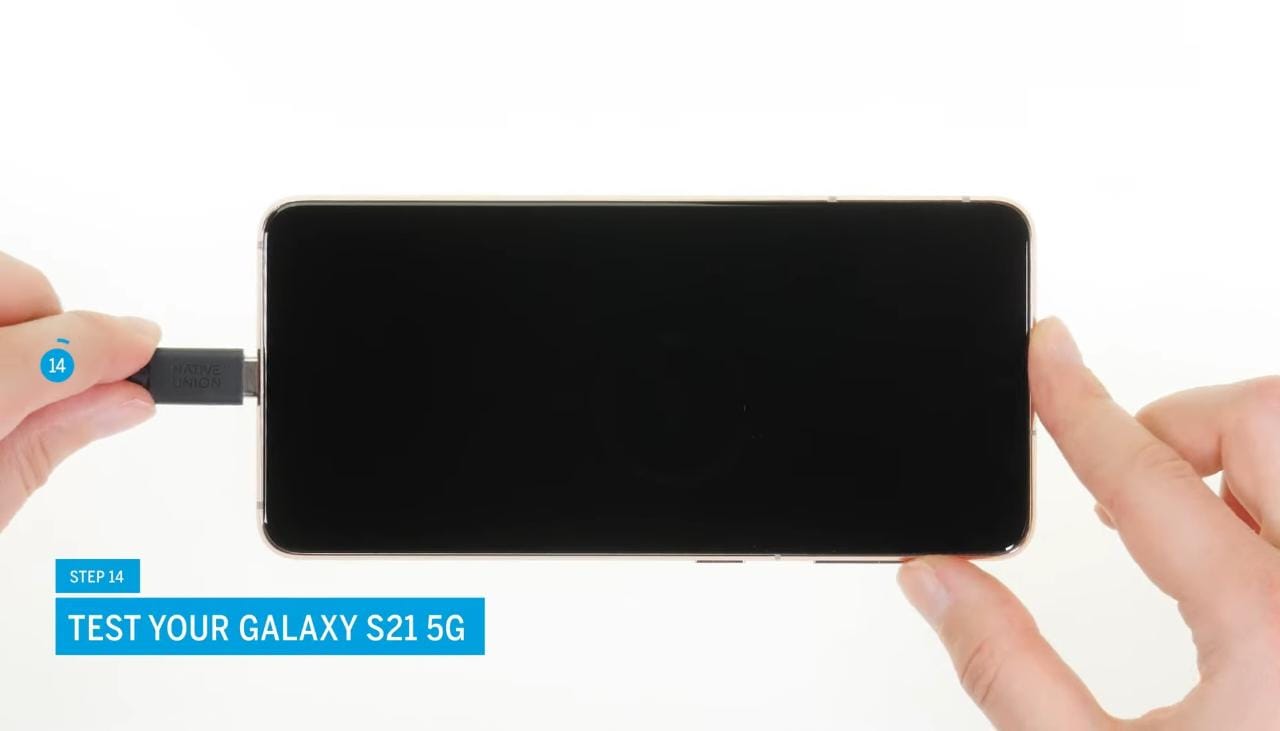
 Step 14: Test your Galaxy S21
After completing the battery replacement process, testing your Samsung Galaxy S21 to ensure everything is functioning correctly is essential. Follow these steps:
- Locate the power button on your Samsung Galaxy S21 and press it down and hold it firmly, hold the button until it gets power on.
- Once your Galaxy S21 boots up, check if the battery is charging properly.
- Test the features and all the functionalities of your device, including the display, audio, camera, and connectivity options.
- Ensure that the battery percentage is increasing as expected while charging.
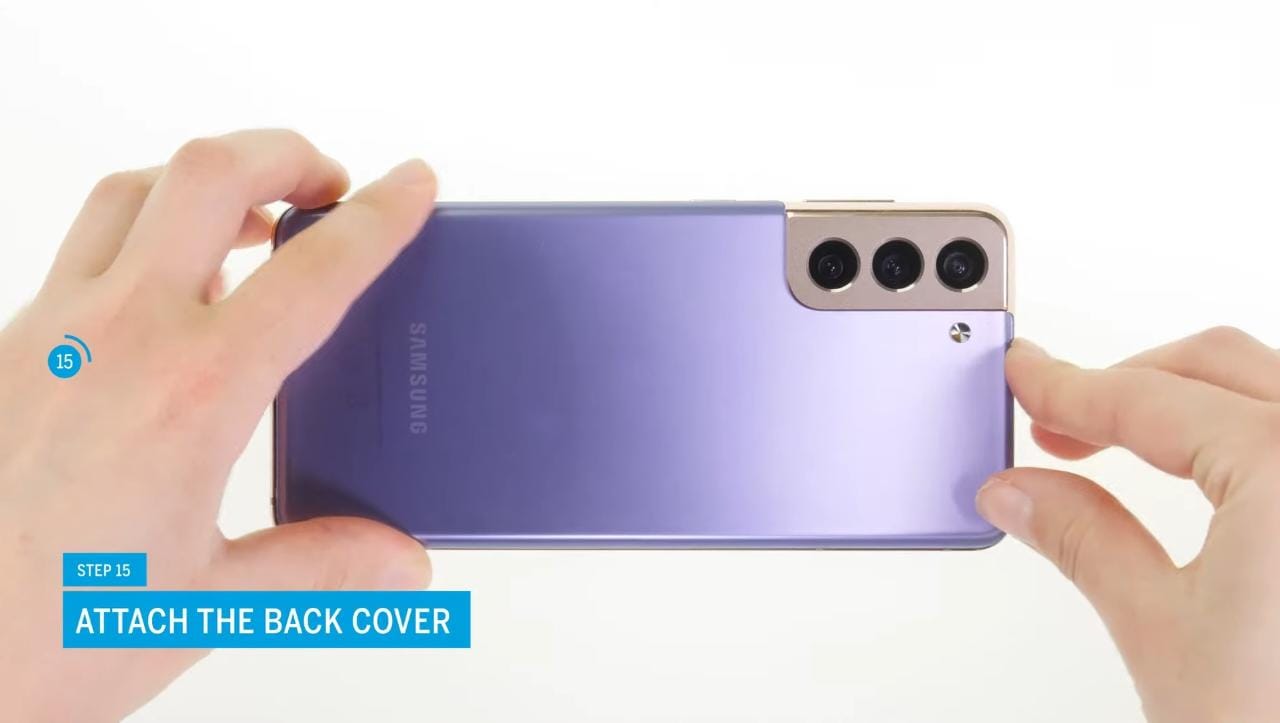
 Step 15: Attach the back cover
In the final step, you will attach the back cover of your Samsung Galaxy S21. Follow these steps:
- Take the back cover and align it with the phone’s frame, ensuring all edges and corners match up.
- Gently press the back cover into place, starting from one side and slowly moving to the other.
- Apply even pressure to the entire surface of the back cover until it snaps securely into place.
By attaching the back cover correctly, you will complete the battery replacement process for your Galaxy S21, ensuring its overall integrity and functionality.
 Conclusion
You have accomplished the task of replacing the battery in your Samsung Galaxy S21 successfully. By following these step-by-step instructions, you can extend the life of your device and enjoy improved battery performance. Remember to proceed with caution, exercise patience, and if you encounter any difficulties, it’s always best to seek professional assistance. With your newly installed battery, your Samsung Galaxy S21 is ready to keep up with your daily demands.

 Step 2: Remove the back cover
 Step 3: Remove the NFC antenna
 Step 4: Remove the speaker
 Step 5: Detach the connecting cables
 Step 6: Detach the screen cable
 Step 7: Remove the battery
 Step 8: Prepare the new battery
 Step 9: Insert the new battery
 Step 10: Attach the screen cable
 Step 11: Attach the connecting cables
 Step 12: Insert the speaker
 Step 13: Insert the NFC antenna
 Step 14: Test your Galaxy S21
 Step 15: Attach the back cover
 Conclusion