Are you experiencing issues with the loudspeaker on your Samsung Galaxy S21? Does the sound quality seem distorted or barely audible? Don’t worry. We have a step-by-step guide to the Samsung Galaxy S21 Loudspeaker Replacement. Now it’s time to return the crisp and clear audio performance you deserve.
The loudspeaker plays a vital role in the overall functionality of your Samsung Galaxy S21. It allows you to enjoy music videos and phone calls with crystal-clear sound. However the loudspeaker can wear out or become damaged over time leading to muffled or non-existent audio.

But before diving into the repair process it’s essential to approach it cautiously. Repairing electronic devices like Galaxy 21 requires careful handling to avoid further damage. Throughout this guide we’ll provide clear instructions and safety tips to ensure you can successfully replace the loudspeaker without mishaps.
Forget all the worries after reading this guide. You’ll save money on professional repairs. And also gain a sense of accomplishment in restoring your
loudspeaker and enhancing its audio capabilities. So let’s get started and bring back the joy of high-quality sound to your smartphone!
Precautions and Safety Measures
When working with electronic devices like the Samsung Galaxy S21 it’s crucial to prioritize safety. By following these precautions. You can minimize the risk of accidents and ensure a smooth and secure repair process.
● Power Off the Device and Remove Power Sources
Before you begin any repair work completely power off your Samsung Galaxy S21. This prevents any potential electrical mishaps and safeguards both you and your smartphone.
● Work in a Clean and Well-Lit Environment
Find a clean and bright workspace to repair. A cluttered or dark environment can increase the chances of losing small components or accidentally damaging the Galaxy S21. Adequate lighting will help you see clearly and perform tasks with precision.
● Wear Safety Gear
Consider wearing safety gear such as anti-static gloves and safety glasses to protect yourself and the technological device from potential damage. These precautions are essential when handling delicate internal components.
● Keep Track of Screws and Components
During disassembly keep track of all the screws and components you remove. Consider using a magnetic mat or small containers to organize and label them. This ensures you can easily reassemble the smartphone Samsung Galaxy S21 without any confusion or missing parts.
● Avoid Excessive Force
Take your time and use gentle force when prying open the device or detaching connectors. Excessive force can cause unintended damage to the device’s fragile components such as the screen or circuitry.
● Beware of Sharp Objects
Be cautious of any sharp objects or tools you use during the repair process. Mishandling these tools can lead to injuries or scratches on the device. Always handle them with care and keep them away from children or pets.
These precautions can ensure a safe working environment and minimize the risk of accidents or further damage. Remember if you feel
it’s best to seek professional assistance or contact Samsung’s customer support. Your safety and the integrity of your Smartphone are of utmost importance.
Let’s begin the step-by-step procedure of Samsung Galaxy S21 Loudspeaker repair!
Step 1—Gathering the Necessary Tools and Replacement Parts for Samsung Galaxy S21 Loudspeaker Repair

You’ll need a few essential tools to replace the loudspeaker on your Samsung Galaxy S21 successfully. Here’s a list of the tools required for this repair:
● Phillips Screwdriver
This screwdriver size #00 or #000 is necessary for removing the screws securing the device’s components.
● Plastic Prying Tool
A plastic prying tool helps carefully separate the back cover and other components without causing any damage to the device.
● Tweezers
Tweezers help handle small components and connectors during the repair process. They provide precision and control when working with delicate parts.
● Opening Picks
Opening picks sometimes called guitar picks are thin and flexible tools that aid in prying open the device and separate components without scratching or bending them.
● Replacement Loudspeaker
Ensure you obtain a compatible replacement loudspeaker for your Samsung Galaxy S21. You can find these parts at authorized Samsung dealers or reputable online retailers specializing in smartphone repair parts.
When searching for replacement parts choosing authorized dealers or reliable online retailers is crucial. This ensures that you receive high-quality and compatible components for your device.
Here are a few tips on where to find compatible replacement parts
● Authorized Samsung Dealers
Visit an authorized Samsung service center or authorized dealers. They can access genuine Samsung parts and provide the correct replacement loudspeaker for your Samsung Galaxy S21.
● Reputable Online Retailers
Look for reputable online retailers specializing in smartphone repair parts such as Drive by Repairs. They offer compatible replacement loudspeakers specifically designed for the Samsung Galaxy S21. Read customer reviews and check for warranties or return policies to ensure a satisfactory purchasing experience.
By using the correct tools and obtaining compatible replacement parts from trusted sources you can proceed confidently and increase the chances of a successful loudspeaker replacement for your Samsung Galaxy S21.
Step 2—Switch Off Your Samsung Galaxy S21

To power off your Samsung Galaxy S21 for loudspeaker replacement follow these simple steps:
- Press and hold the side and volume down buttons simultaneously for a few seconds.
- A menu will appear on the screen.
- Tap “Power off” in the displayed menu.
- Confirm the action by entering your Samsung S21 unlock code if prompted.
Following these steps you can easily switch off your Samsung Galaxy S21 and prepare it for any necessary repairs. Remember to keep your unlock code handy to complete the power-off process successfully.
Step 3—Heating Up the Back Cover

Heat the edge to soften the adhesive before removing your Samsung Galaxy S21’s back cover. Follow these steps.
- Be careful not to burn your fingers after heating.
- Use a hot air device and run it evenly over the back cover.
- Heat the back cover so you can still touch it comfortably.
- Heating helps loosen the adhesive making it easier to remove the back cover without causing damage to the device.
By exercising caution and following these instructions you can safely heat the back cover of your Samsung Galaxy S21 for smooth and successful disassembly.
Step 4—Lifting the Back Cover
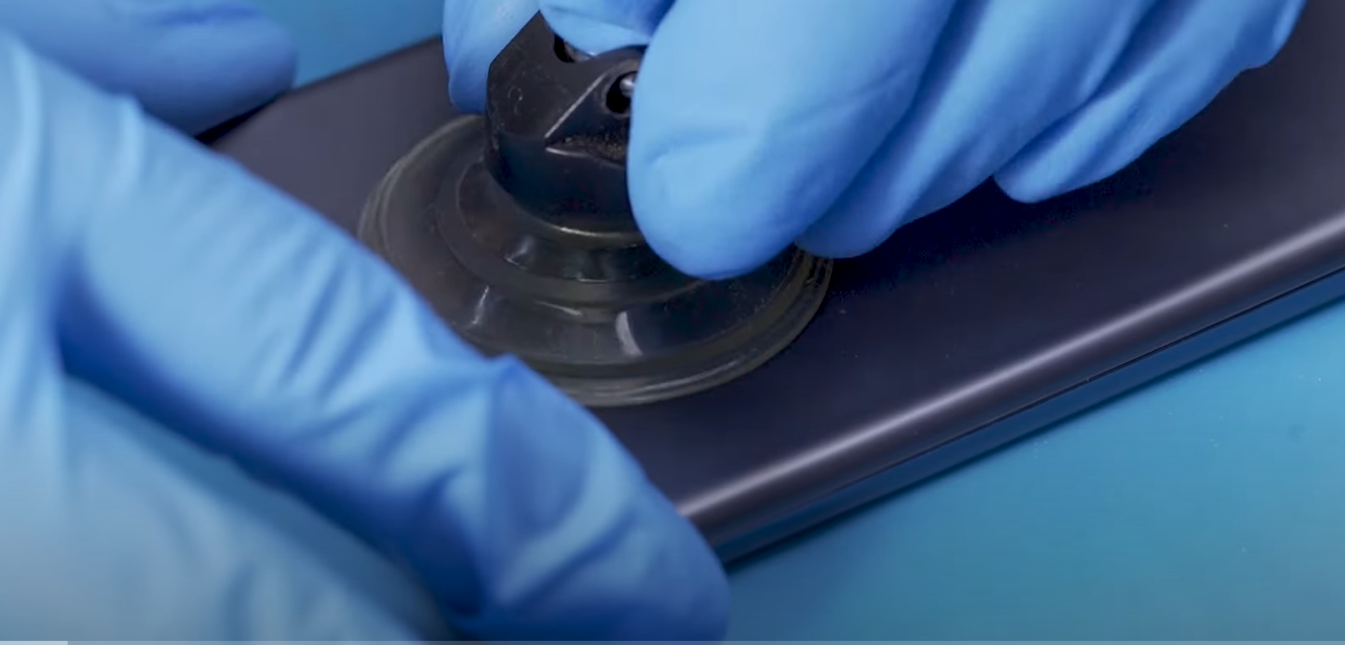
To remove the back cover of your Samsung Galaxy S21 follow these steps:
- Attach a suction cup to the lower edge of the back cover and apply gentle pressure.
- Pull the suction cup upwards to create a small gap between the back cover and the Galaxy s21.
- While maintaining the suction cup’s grip insert an opening tool between the display.
- Carefully slide the opening tool along the edge separating the back cover from the phone.
Using a suction cup and an opening tool you can safely lift the back cover of your S21.
Step 5—Detach the Back Cover

To detach the back cover of your Samsung Galaxy S21 follow these steps:
- Drive the tool entirely around the edge of the back cover applying gentle pressure to loosen it piece by piece.
- Slide flat picks under the back cover regularly to prevent the glue from bonding again.
- Take caution not to insert your tool too far into the device to avoid damaging the camera module.
- Use a hard plastic pick designed to prevent over-insertion and ensure safe detachment.
Step 6—Removing the Back Cover

After completely detaching the back cover of your Samsung Galaxy S21 proceed with the following steps:
- Remove all plastic picks from the edges of the back cover.
- Carefully unfold the back cover to avoid strain or damage to any cables or components.
- Set the back cover aside in a safe place ensuring it remains free from any potential damage or debris.
Step 7—Unscrew the Charging Coil

To access the charging coil of your Samsung Galaxy S21 follow these steps:
- Using a Phillips screwdriver loosen the five Phillips screws securing the charging coil cover.
- Place the screws on a magnetic pad or tray to keep them organized and prevent loss.
- Don’t mix up the screws as they vary in size or length.
Step 8—Detaching the Battery Connector

When detaching the battery connector of your Samsung Galaxy S21 follow these steps:
- Lift the metal cover of the NFC antenna located near the battery.
- Using a plastic lever tool carefully pry the orange battery connector underneath from the motherboard.
- Use a plastic spudger for this task to minimize the risk of damage.
Precaution
Always detach the battery connector as soon as possible to prevent a potential short circuit. When separating connectors begin from the side of the motherboard where there are no small components to avoid any accidental damage.
By following these steps and taking the necessary precautions you can safely detach the battery connector of your Samsung S21. It will ensure a smooth and secure repair process.
Step 8—Disconnecting the Charging Coil

To disconnect the black connector of the charging coil in your Samsung Galaxy S21 follow these steps:
- Carefully lever off the black connector from the circuit board using a spudger tool.
- Apply gentle pressure to separate the connector without causing any damage to the circuit board or the connector itself.
- Take your time and ensure a smooth disconnection to avoid any potential issues.
Step 9—Remove the Charging Coil

After successfully separating the connectors you can proceed with removing the charging coil from your Samsung Galaxy S21 by following these steps:

- Carefully grip the charging coil with your fingers or tweezers.
- Apply gentle and even pressure to pull the charging coil away from the device.
- Ensure that no other components or cables are obstructing their removal.
- Take your time and carefully handle the charging coil to avoid any damage.
Following these steps you can safely remove the charging coil from your Samsung Galaxy S21.
Step 10—Unscrewing the Speaker

To access the speaker module of your Samsung Galaxy S21 follow these steps:
- Using a Phillips screwdriver remove the six Phillips screws securing the speaker module.
- Place the screws on a magnetic pad or tray to keep them organized and prevent loss.
- Don’t mix up the screws as they vary in size or length.
By unscrewing the speaker module you can proceed with the next steps of the loudspeaker repair process for your S21.
Step 11—Removing the Speaker
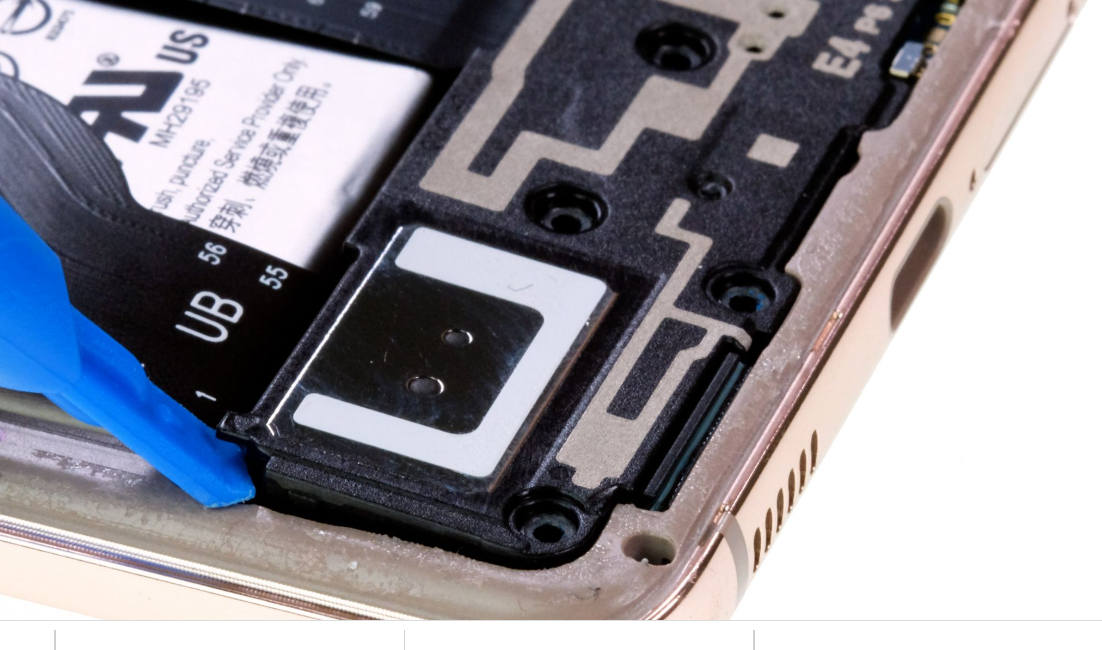
To remove the speaker module
S21 follow these steps:
- Carefully use a lever or prying tool to lift the speaker module out of its guide gently.
- Take caution not to apply excessive force or damage the surrounding components.
- Once the speaker module is free set it aside in a safe place to avoid any potential damage.
You can successfully remove the speaker module from your Samsung Galaxy S21 by following these steps. That’s how you will replace the loudspeaker of your Samsung galaxy s21.
Step 12 —Installing the New Speaker

To install the new speaker into your Samsung Galaxy S21 follow these steps:
- Take the new speaker and ensure it matches the specifications and design of the original speaker.
- Carefully position the new speaker in the designated area within the display unit.
- Align the connectors of the new speaker with the corresponding ports on the device.
- Gently press the speaker into place ensuring a secure and snug fit.
Step 13 —Tightly Screwing the Speaker

To secure the speaker module in place within your Samsung Galaxy S21.
- Use a Phillips screwdriver to screw the speaker module with the six Phillips screws tightly.
- Ensure that each screw is correctly aligned and properly tightened.
- Take caution not to mix up the screws as using a screw that is too long or in the wrong place could potentially damage the display.
Following these steps and taking the necessary precaution to avoid any mix-ups or damage. It will allow you securely fasten the speaker module in your Samsung Galaxy S21 ensuring optimal audio performance.
Step 14 —Reinstallation of the Charging Coil

- Reposition the NFC antenna in the screen unit ensuring it aligns properly.
- Press the back end of the NFC antenna slightly to allow the glue to bond again.
- Do not apply excessive pressure or damage the antenna or other components.
Step 15—Connecting the Charging Coil and Attaching the Battery Connector

It’s time to complete the installation of the charging coil and reattach the battery connector in your Samsung Galaxy S21.
- Lift the metal cover of the charging coil to access its black connector located underneath.
- Carefully align and attach the black connector to its corresponding port on the circuit board.
- Next reattach the orange battery connector to the motherboard ensuring a secure connection.
Precaution
Always connect the battery connector last to avoid the risk of a potential short circuit. By following this precaution you can minimize any potential electrical hazards and ensure the device’s safety during the repair process.
You have successfully connected the charging coil and attached the battery connector to your Samsung Galaxy S21. It will allow restoring its functionality and preparing it for reassembly.
Step 16—Screwing the Metal Cover Plate

Now secure the metal cover plate back onto your Samsung Galaxy S21 after reconnecting the battery and charging coil.
- Align the metal cover plate over the respective connectors and screw holes.
- Use a Phillips screwdriver to screw the metal cover plate back in place carefully.
- Ensure each screw is tightened securely but not overly tightened avoiding damage to the components.
Step 17—Testing The Galaxy S21
Now that you have completed the loudspeaker replacement for your Samsung Galaxy S21. Now it’s time to test the functionality and ensure everything works as expected.
- Switch on your Galaxy S21 to power it up.
- To further validate the functionality of your new speaker you can access the Samsung test menu by dialing #0# in the phone app.
- In the test menu locate the speaker test option and proceed to test the sound output. Ensure that the audio is clear without any distortion or abnormalities.
- Additionally you can utilize the test menu to check the functionality of other components such as the display touch screen sensors and more. This comprehensive testing helps ensure that all parts of your device function correctly.
- Alternatively you can utilize Samsung’s official support resources or applications in app stores that provide diagnostic tools to test various device components.
Remember it’s essential to exercise caution and patience during the repair process. If you feel you need more clarification at any point it is recommended to seek professional assistance.
Step 18—Reattaching the Back Cover


Its time to complete the repair process for your Samsung Galaxy S21 5G
- Ensure that the device is powered off.
- Take the back cover and align it with the edges of the display unit.
- Press the back cover onto the display unit starting from the lower edge and working your way up.
- Apply even pressure along the edges to ensure a proper fit.
- Once the back cover is securely in place you will hear a clicking sound or a slight snap.
Conclusion
This guide has provided clear instructions for repairing and replacing the loudspeaker in your Samsung Galaxy S21. The loudspeaker is vital for your device’s functionality so proceeding cautiously is essential.
Suppose you need help with the Samsung Galaxy S21 loudspeaker replacement. It’s best to seek help from authorized service centers or qualified technicians. They have the expertise needed to ensure a successful repair without complications. Check out Drive by Repairs. We are eager to help you by reaching your doorsteps.
However throughout the repair prioritize your safety by turning off the Galaxy s21 working in a clean and bright space and handling tools and parts carefully. Be mindful of heat to avoid burns. By following this guide you can confidently replace the loudspeaker in your Samsung Galaxy S21. Enjoy the improved audio quality and the satisfaction of a job well done.