Imagine your photos could come to life for a quick moment – that’s what Live Photos do! We will tell you an easy way to turn a Live Photo into a video on your iPhone and iPad in a few steps. Let’s dive in!
Apple announced Live Photos with the iPhone 6S in 2015. Live Photos are short 1.5-second videos that capture what happens just before and after you take a picture with your iPhone or iPad. These small 1.5-second videos are similar to GIFs. Live Photos can record your memorable real-life moments with background music.
Discover the easy way to transform your Live Photos into a video on your iPhone or iPad by following our simple step-by-step guide.
Turn A Live Photo Into A Video on an iPhone or iPad
If you own an iPhone or iPad you can use the Live Photos feature to make your static photos more engaging. Live Photos are short video clips that last for three seconds, capturing 1.5 seconds of action before and after you take the picture. This fun feature adds movement and audio to your photos and makes them more dynamic and memorable. Follow these steps to turn a Live Photo into a video on an iPhone or iPad:
Step 1
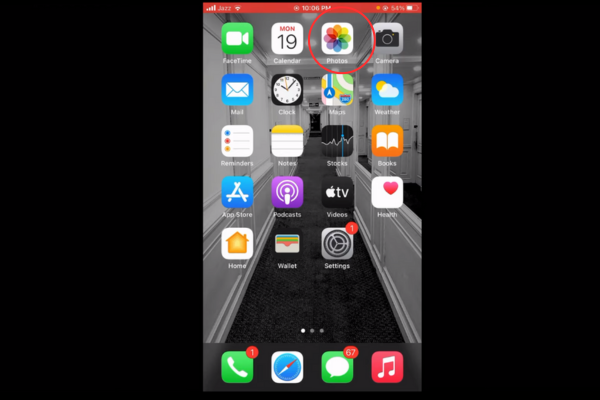
Select and open the Photos app on your iPhone or iPad and tap on the album icon which appears on the bottom.
Step 2
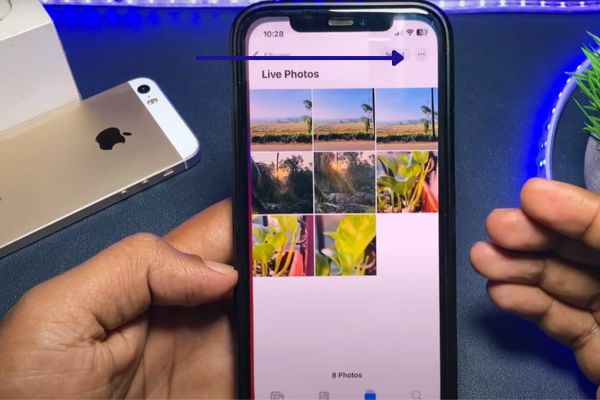
Please proceed by scrolling down and choosing “Live Photos” from the options listed under “Media Types.” This action will display a gallery view exclusively containing the Live Photos stored within your photo library.
Step 3
Select the image you want to turn into a GIF like small video.
Step 4
Once you have your selected Live Photo open, tap on the three-dot More button located at the upper right corner of the screen. This action will bring up a drop-down menu offering additional options for you to choose from. If you are using iOS 15 then you have to tap on the share button.
Step 5
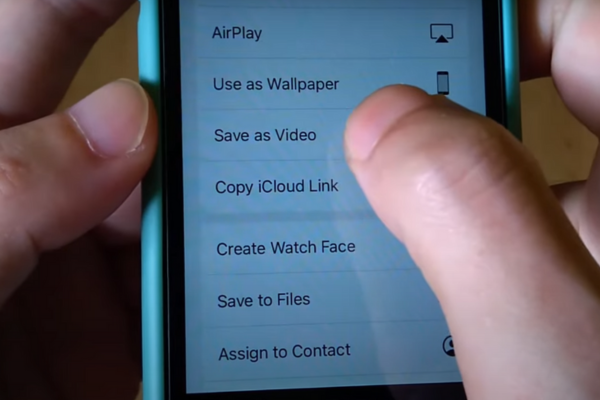
Select the “Save as Video” choice from the pop-up menu (for iOS 16) or from the share sheet (for iOS 15). This action will prompt your iPhone to generate a duplicate of the Live Photo in the form of a small video clip.
Step 6
The video clip will be saved with the same metadata as the original live photo, including the same date or time and location information. This means it will be sorted alongside the original Live Photo.
How Can You Add Special Effects To Live Photos
Enhance your Live Photos with special effects! Apple offers these three unique effects to choose from:
- Loop
- Bounce
- Long Exposure
The “Loop” option transforms your Live Photo into a brief, continuous loop without any interruptions, while “Bounce” causes the Live Photo to play back and forth in a continuous manner. On the other hand, “Long Exposure” presents your Live Photo as a static image, blending the three-second video segment to increase the effect of a photograph captured with an extremely slow shutter speed.
Add a special effect to your Live Photos in the following two steps :
Step 1
Launch the Photos app and pick a Live Photo.
Step 2
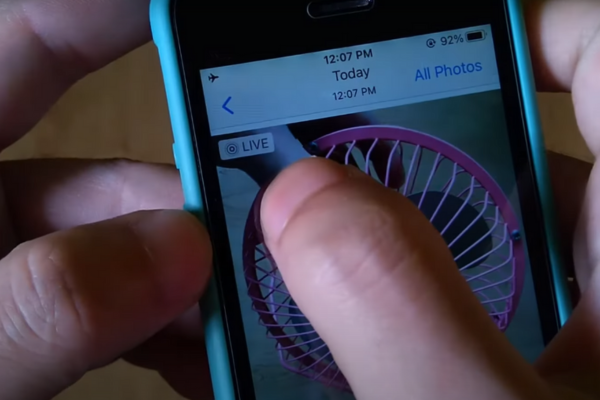
Once the image you have selected is open, tap the Live button located in the upper left corner. From the dropdown menu opt for Loop, Bounce, or Long Exposure. Alternatively, you can choose “Off” if you prefer the Live Photo to be displayed as a standard static image.
Important Tip
Apple iPhone or iPad selects the best frame of your tiny video which is called “Key Photo’’ after you take a Live Photo. It is the main snapshot that represents the entire Live Photo. But if you do not like the one Apple has selected, no worries! You can easily pick a different snapshot from all the other frames that make up your Live Photo.
How To Combine Multiple Live Photos Into A Single Video Clip
Combining multiple Live Photos into a single video clip is possible with iOS 16. Here is the process:
Step 1
Launch the Photos app on your iPhone.
Step 2
Tap on the Album icon located at the bottom.
Step 3
Scroll down and click on Live Photos from the list situated below “Media Types.” This action will display only the Live Photos present in your photo library.
Step 4
Select the “Select” option from the top right corner.
Step 5
Choose the Live Photos you wish to merge into a video by selecting them.
Step 6
Open your selected Live Photo, then tap the three-dot More button located at the bottom right of the screen. This action will bring up the options menu.
Step 7
Choose Save as Video.
The duration of this process may vary based on the number of photos you have chosen. It could take anywhere from a few seconds to a couple of minutes. During this time, you’ll observe a “Saving” dialog box which will indicate that your Live Photos are being transformed into a video.
Bottom Line
Well done! you have learned how to turn your Live Photos into a video on your iPhone or iPad with our guide. Now you can capture the precious moments of your life with the exciting Live Photos feature of iPhone and iPad and share them on your social media accounts with your friends and family. Give your photos an extra touch of enjoyment with Live Photos.

