Are you experiencing difficulty hearing on your iPhone 14 Pro Max? If you are facing audio issues, such as complete loss of sound and distortion, then don’t worry. You are on the right page. Replacing the ear speaker on your iPhone 14 Pro may seem daunting, but it is entirely doable with the right guidance. You can easily replace your iPhone 14 Pro ear speakers yourself.
In this step-by-step guide, we will cover all the essential tools you’ll need, the precautions to take, and the detailed steps to replace your iPhone 14 Pro ear speaker. From disassembling your device safely to ensuring the new speaker is installed correctly, every stage is explained in simple terms. With clear instructions and helpful tips, you’ll have your iPhone 14 Pro working like new in no time. Follow along, and let’s get started on restoring your device’s crystal-clear audio quality.
Precautions:
Precautions are essential to ensure safety and prevent damage when performing delicate tasks like iPhone repairs. They help protect both the device and the individual, ensuring a successful and risk-free process. Here we discuss some important precautions:
- Make sure you fully shut down your iPhone before carrying on with your replacement.
- Keep the hot air gun or hair dryer at least 7 cm away from your iPhone 14.
- Avoid leaving your hair dryer in one place for too long.
- Use safety glasses to protect your eyes during the repair.
- Keep your pick inserted at a safe level of 3 mm to avoid damaging internal parts.
- Do not insert the pick along the left side of the iPhone, as the two cables are prone to damage with a pick.
Gather/Buy Tools for Your Mobile Repair
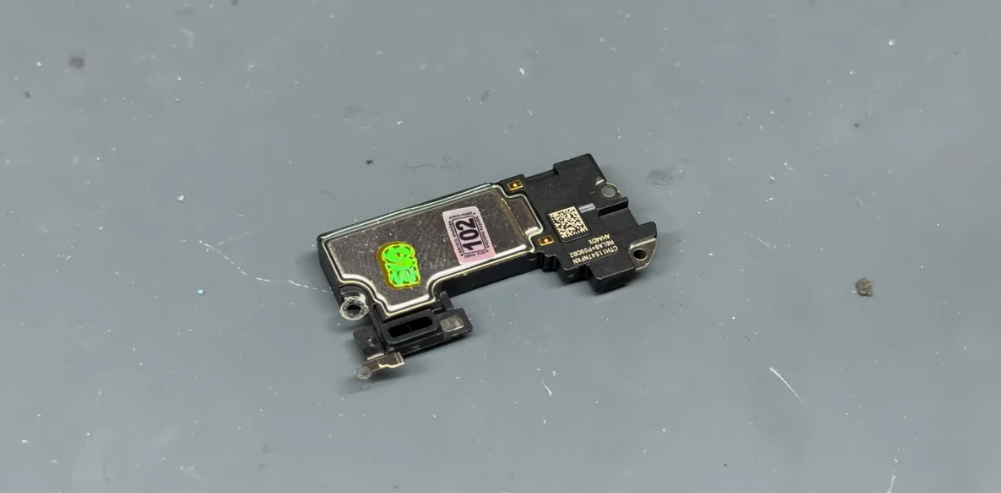
- A new earpiece for iPhone 14 Pro
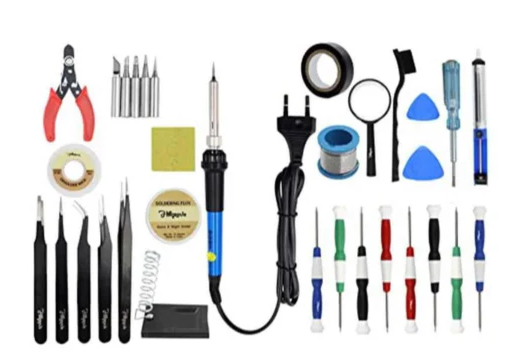
- A pair of tweezers
- A set of screwdrivers
- A Lint-free piece of cloth/a cotton bud
- A plastic opening pick or tool
- Isopropyl alcohol
- Hot Air gun, hair dryer, or hot plate
- Adhesive Glue
- A Suction Cup
- Soldering iron
- A Spudger or prying tool
Steps to Replace iPhone 14 Pro Ear Speaker
- Here is a step-by-step guide to replace the iPhone 14 Pro ear speaker.
Step 1: Turn Off Your iPhone 14 Pro
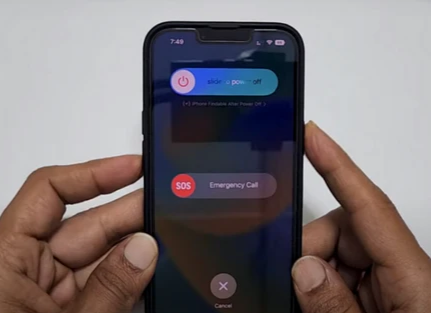
First Method
- Press and hold the power and volume-up buttons together for 15 seconds.
- A power-off slider will emerge on the screen.
- Scroll the button to the right with your finger. Your iPhone will turn off.
Second Method
- Go to Settings
- Click General Settings
- Then, click the shutdown option to turn off your iPhone 14 Pro
Step 2: Unscrew the Pentalobe Screws
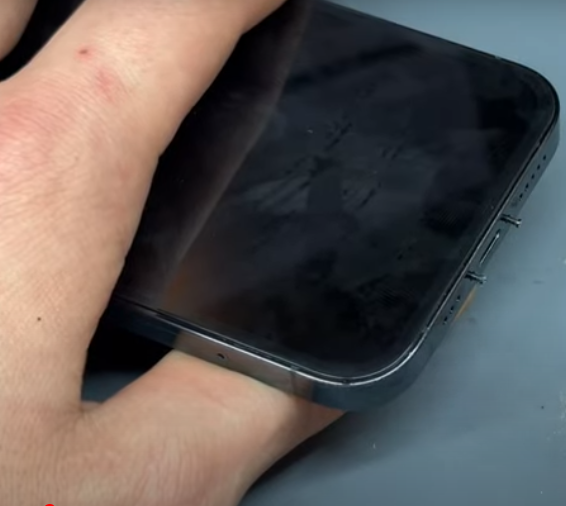
- Take a screwdriver to unscrew the two 6.8-mm Pentalobe P2 screws at the bottom edge of your iPhone 14 Pro.
- Keep these screws in a safe place.
Step 3: Mark Your Opening Picks
- Avoid damaging your device by ensuring your opening pick is inserted correctly.
- Measure 3 mm from the tip of the opening pick and mark it with a permanent marker.
- Consider marking the other corners of the pick with different measurements for varied tasks.
- An alternative method is to tape a coin to the pick, 3 mm from the tip.
- This ensures that the pick does not go deeper than intended, preventing internal damage.
- Regularly check your marks to ensure they remain visible throughout the repair process.
Step 4: Tape Over Any Cracks
- If your iPhone’s screen is cracked, taping over the glass can prevent further breakage.
- Lay overlapping strips of clear packing tape over the screen until the entire surface is covered.
- Wear safety glasses to protect your eyes from any loose glass during the repair.
- If the suction cup doesn’t stick in the next steps, fold a strong piece of tape into a handle to lift the screen.
- In extreme cases, superglue the suction cup to the screen for better grip.
- Taping also helps keep glass fragments contained, reducing the risk of injury.
Step 5: Heat All The corners of Your iPhone 14
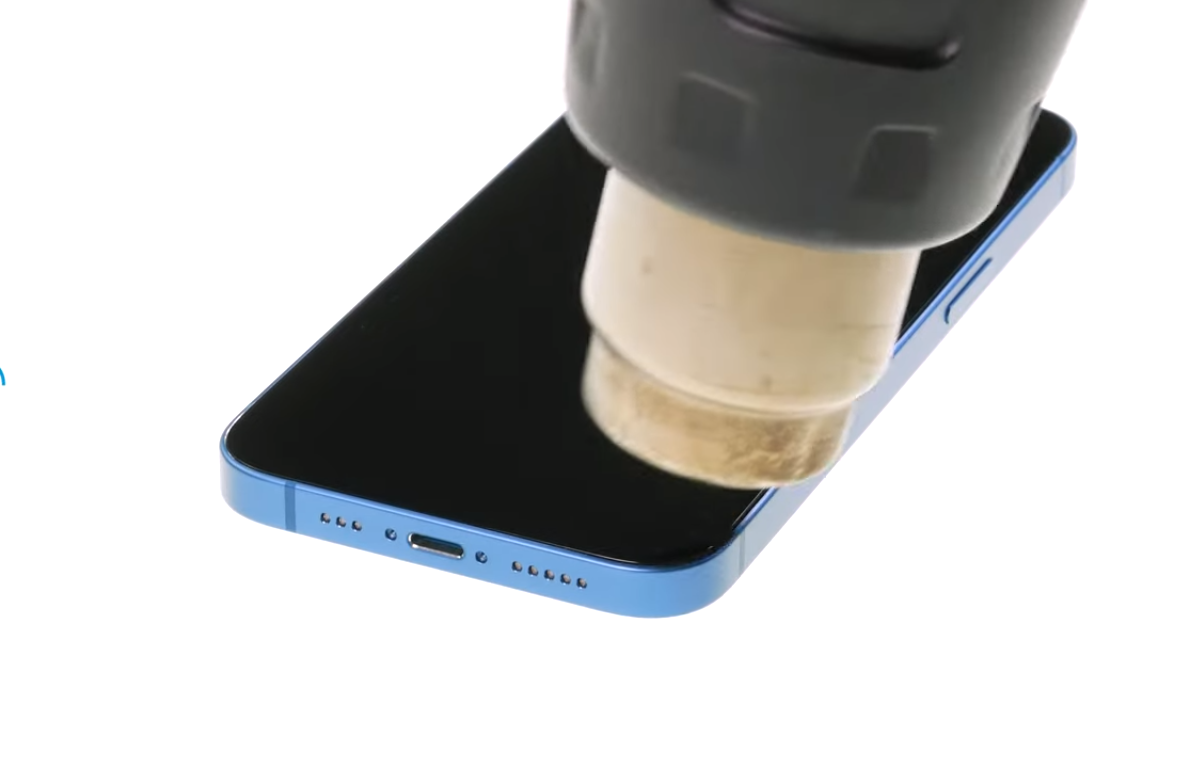
- Take a hot gun or a hairdryer. Adjust the medium heat settings on the hair dryer or heat gun. You can also use a hot plate to heat your iPhone 14 Pro.
- Heat all the corners of your iPhone 14 Pro for a couple of minutes to melt the adhesive glue around the corners of the iPhone.
Step 6: Use A Suction Cup
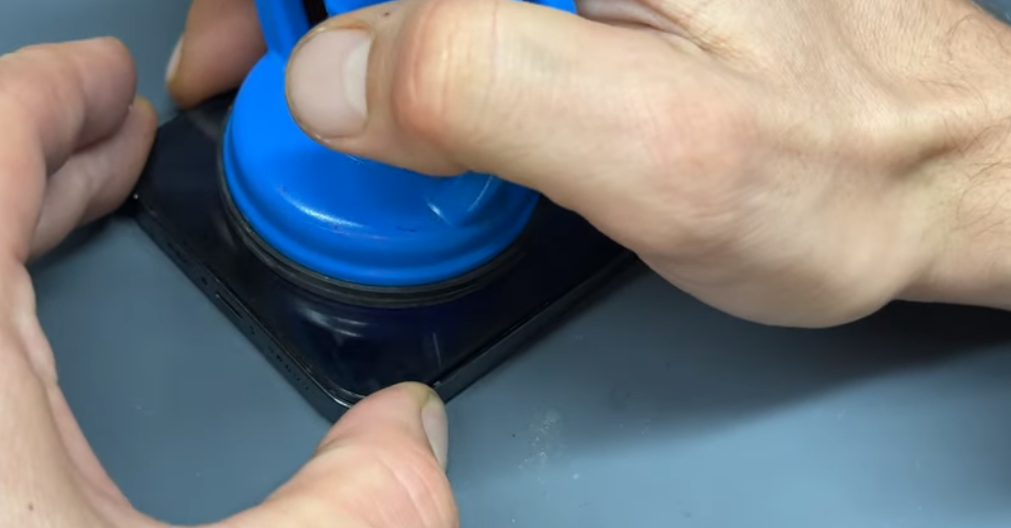
- Take a suction cup and fix it near the bottom edge of the iPhone’s back glass.
- Take a firm grip on the suction cup handle.
- Pull the suction cup handle till the back glass and the iPhone body frame have a gap between them
Step 7: Insert An Opening Pick
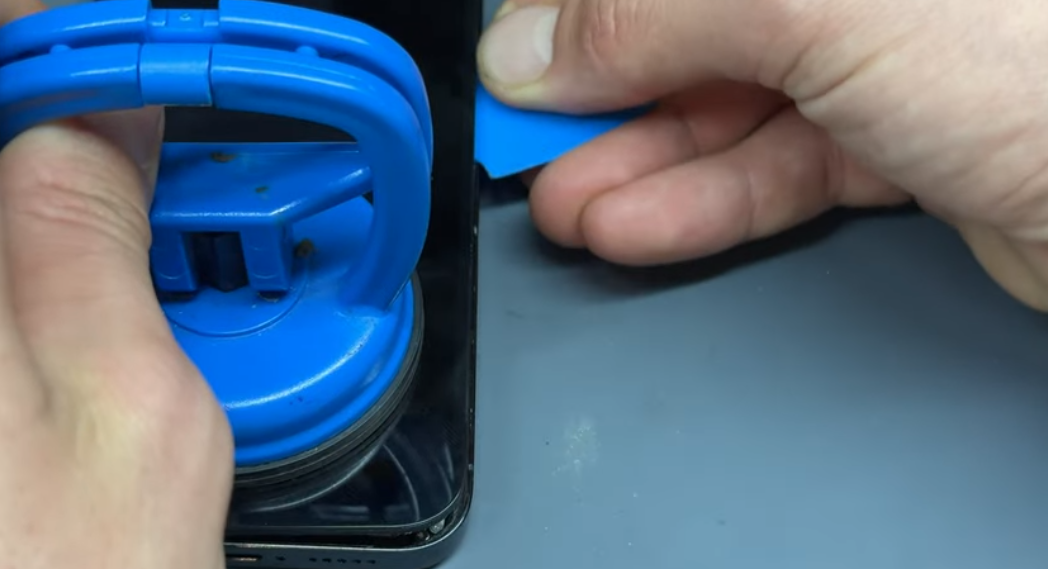
- Pick a plastic opening pick or tool.
- Mark 3 mm on the pick or tool.
- Insert this pick into the gap between the back glass and the iPhone 14 Pro frame.
- Do not insert the pick more than 3mm inside the iPhone to avoid damaging the internal components of your iPhone.
Step 8: Cut Through All the Adhesive Glue
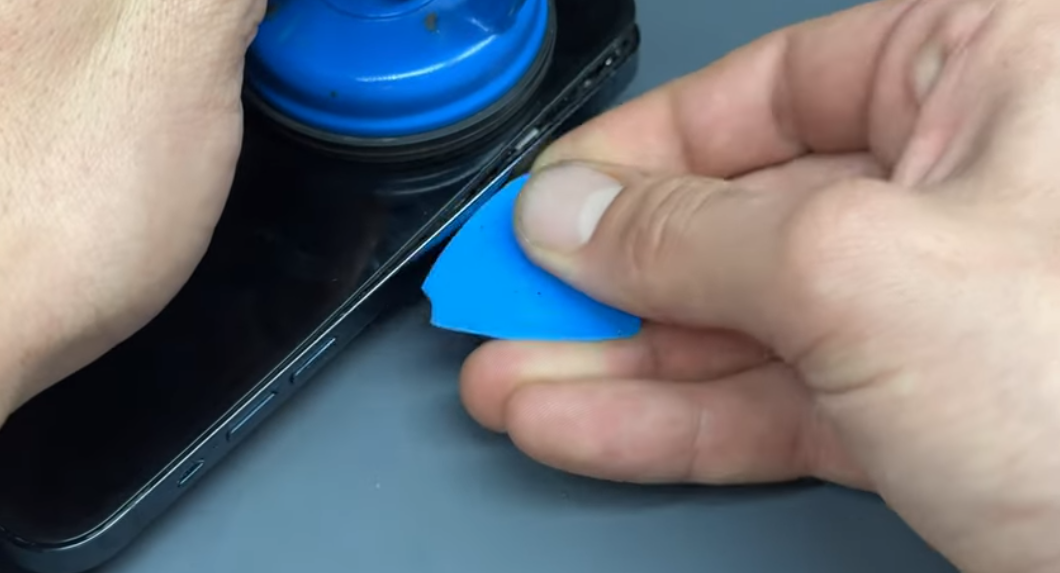
- Hold the opening and slide it from the lower right to the lower left corner to remove the bottom adhesive.
- Move the plastic pick from the lower left to the upper left corner of your iPhone 14.
- Do not insert the pick along the left side of the iPhone, as there are two cables.
- Keep it moving from the upper left to the upper right corner to remove the upper adhesive.
- If you have difficulty removing the adhesive, heat the iPhone again.
- Now, move the pick from the upper right edge to the lower right edge of the iPhone to remove the right-side adhesive. Repeat this process twice or thrice.
Step 9: Lift The Rear Glass and Open the Screen
- Remove the suction handle from the screen before proceeding.
- Rotate your iPhone so the right edge faces you for easier handling.
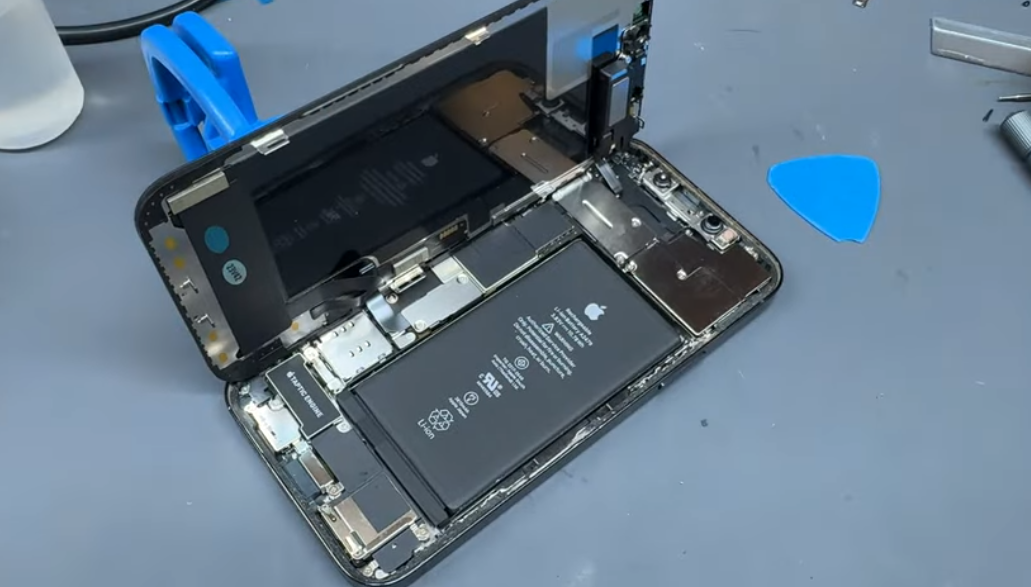
- Open your iPhone by swinging the screen up from the right side, similar to opening a book.
- Lean the screen against a stable object to keep it propped up while you work.
- If nothing is available, use the suction handle to prop up the screen.
- During reassembly, align the screen’s clips along the top edge and press gently into place, ensuring all clips are secure.
Step 10: Remove The Battery
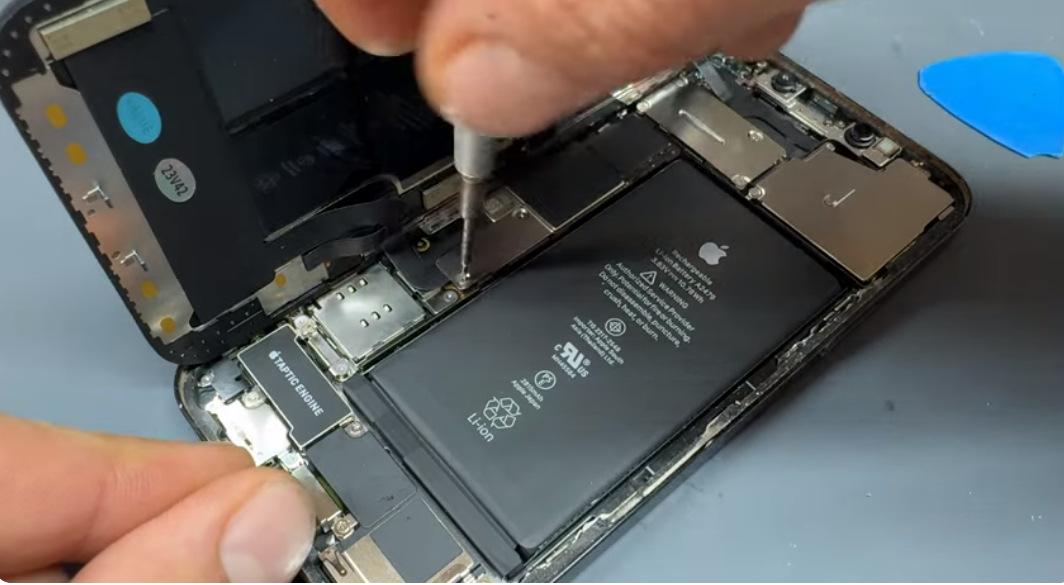
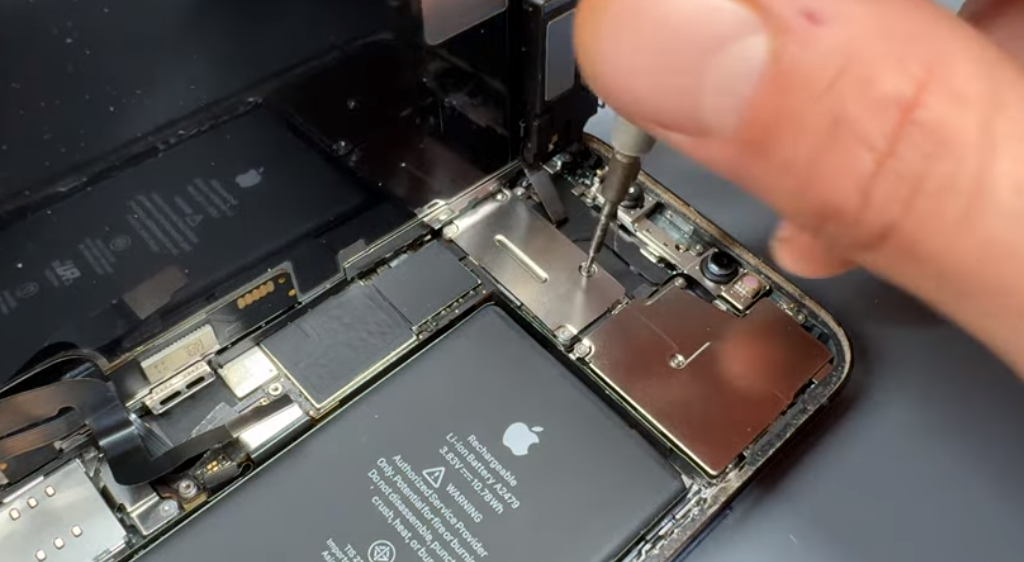
- Unscrew the screws on the battery press connector cover with a screwdriver.
- Keep these two screws in a safe place
- Hold the battery press connector cover with a pair of tweezers or your fingers.
- Take a spudger or prying tool.
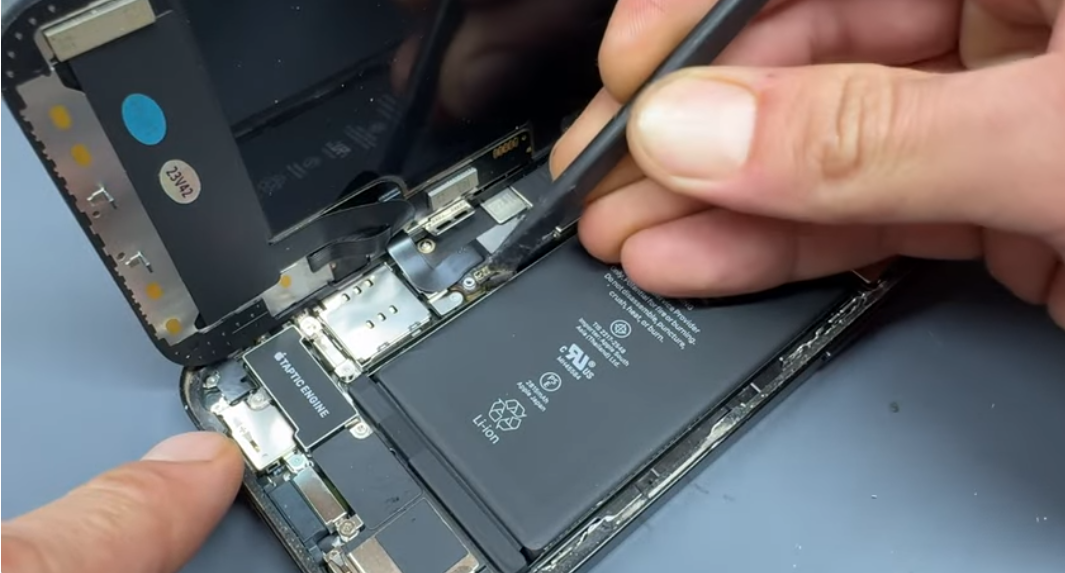
- Disconnect the battery cable connector with the spudger to disconnect the battery
Step 11: Disconnect The Display Cable
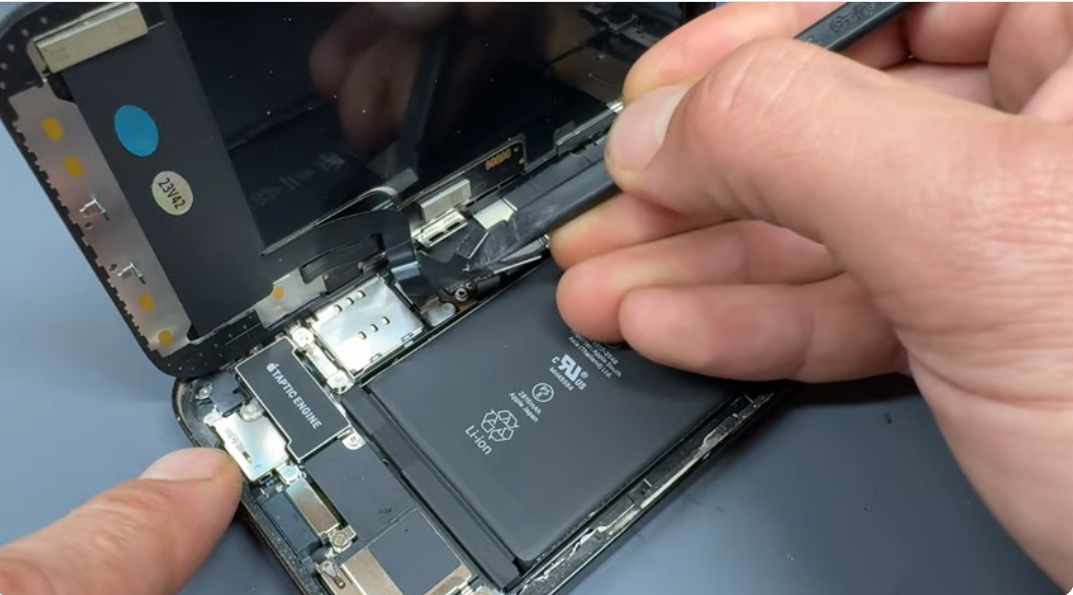
- Use the pointed end of a spudger to disconnect the first display cable by prying the connector straight up from its socket.
- Carefully align and press down on one side of the press connectors until it clicks into place, then repeat on the other side.
- Avoid pressing down on the middle of the connector to prevent misalignment and potential damage.
- Ensure the connector is properly aligned to avoid bending the pins, which can cause permanent damage.
- Use the pointed end of a spudger to disconnect the second display cable by prying the connector straight up from its socket.
Step 12: Unscrew The Charging Coil Connector Cover
- Unscrew the charging coil connector cover.
Step 13: Remove The Charging Coil Connector Cover
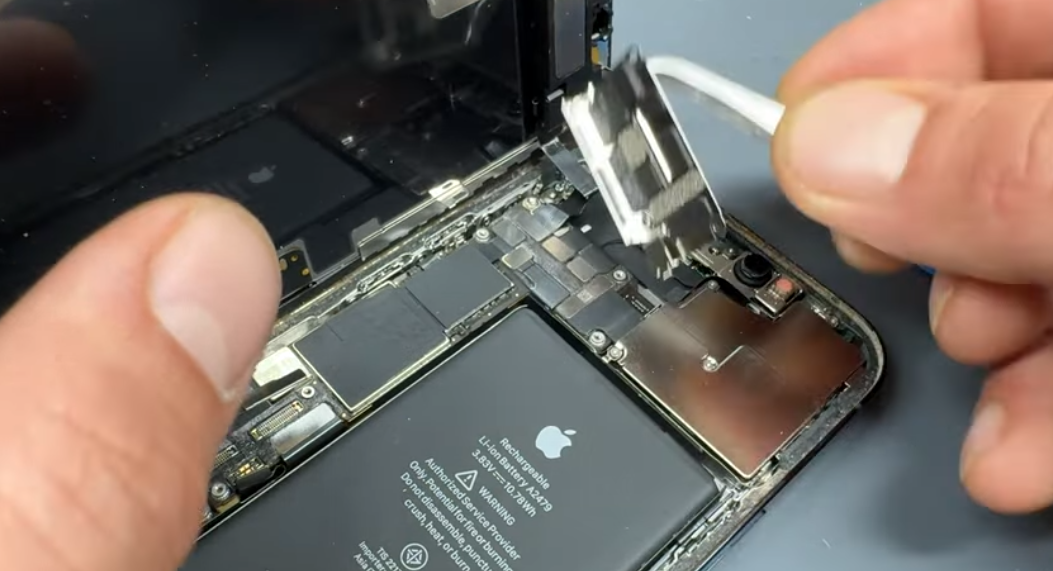
- Hold the charging coil connector cover with the help of a pair of tweezers.
- Remove the charging coil connector cover from its place.
Step 14: Disconnect The Charging Coil
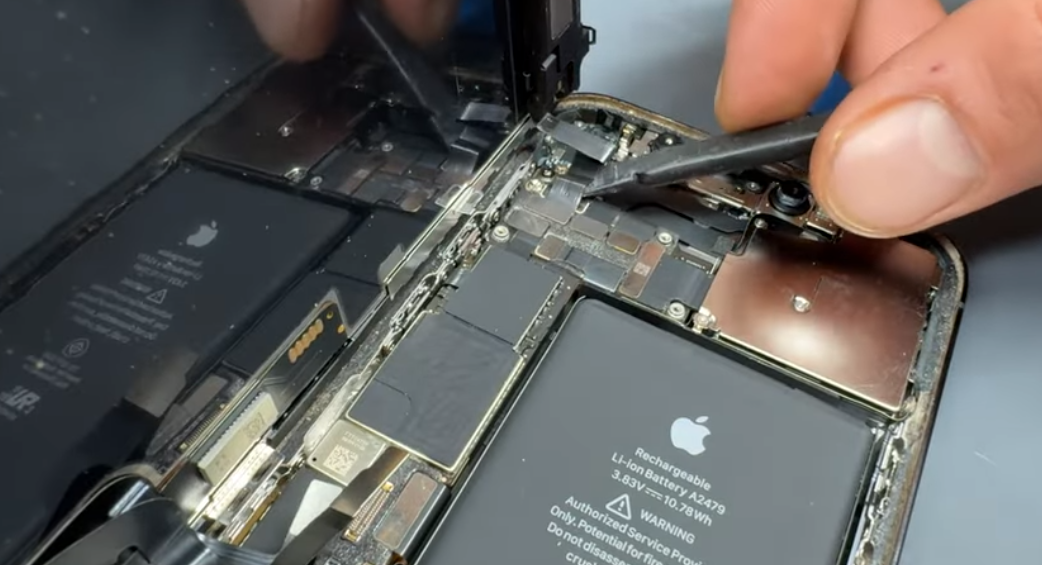
- Disconnect the charging coil press connector with a spudger.
Step 15: Separate The Rear Cover and the Screen
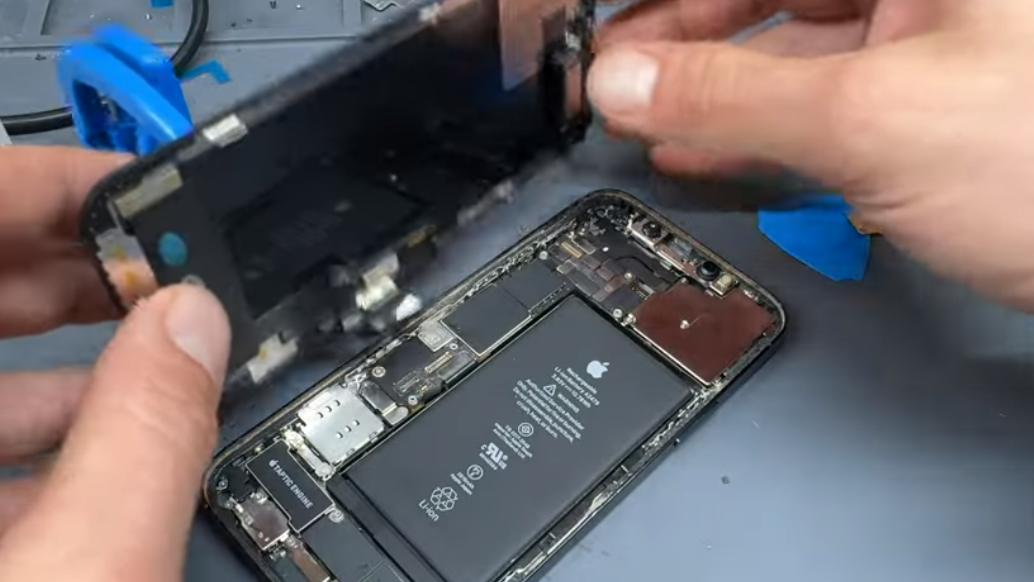
- Now remove the screen from the iPhone 14 Pro and keep it aside.
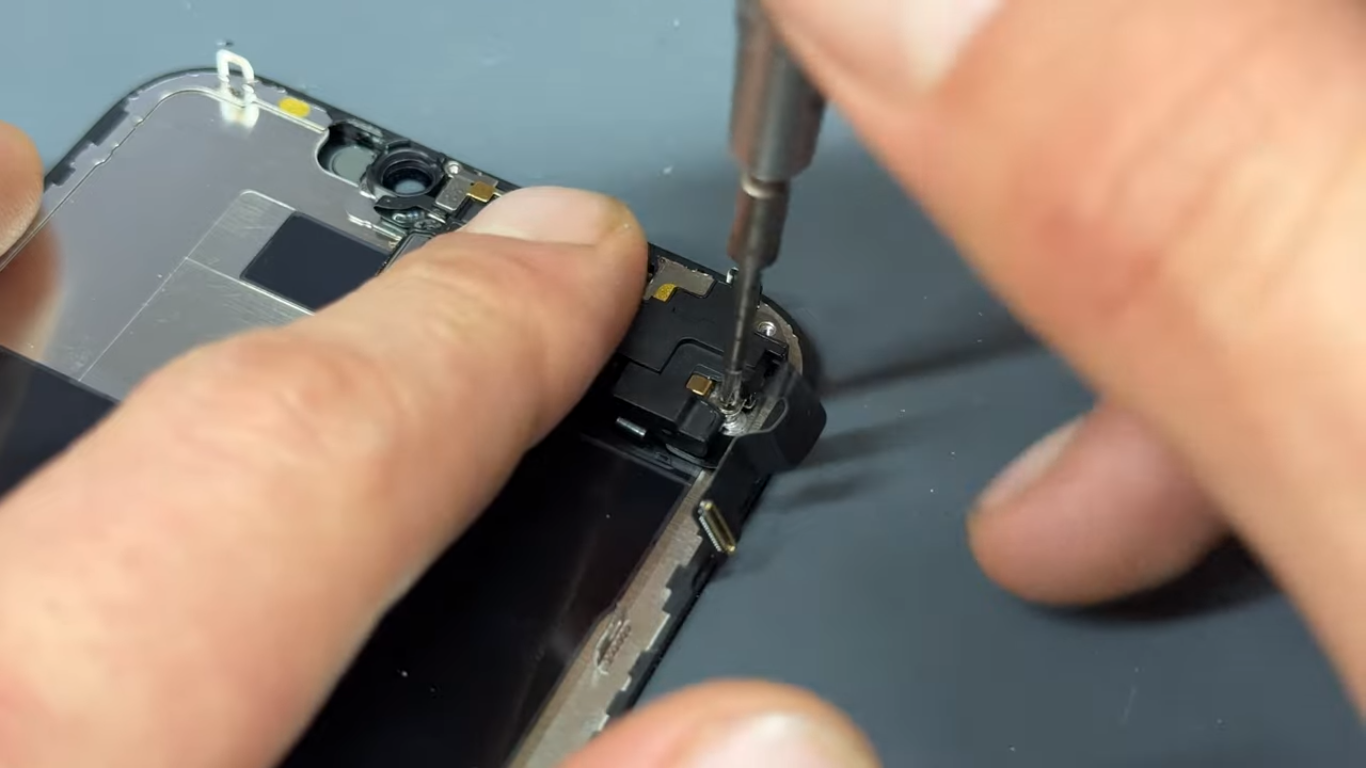
Step 16: Unscrew The Earpiece Speaker
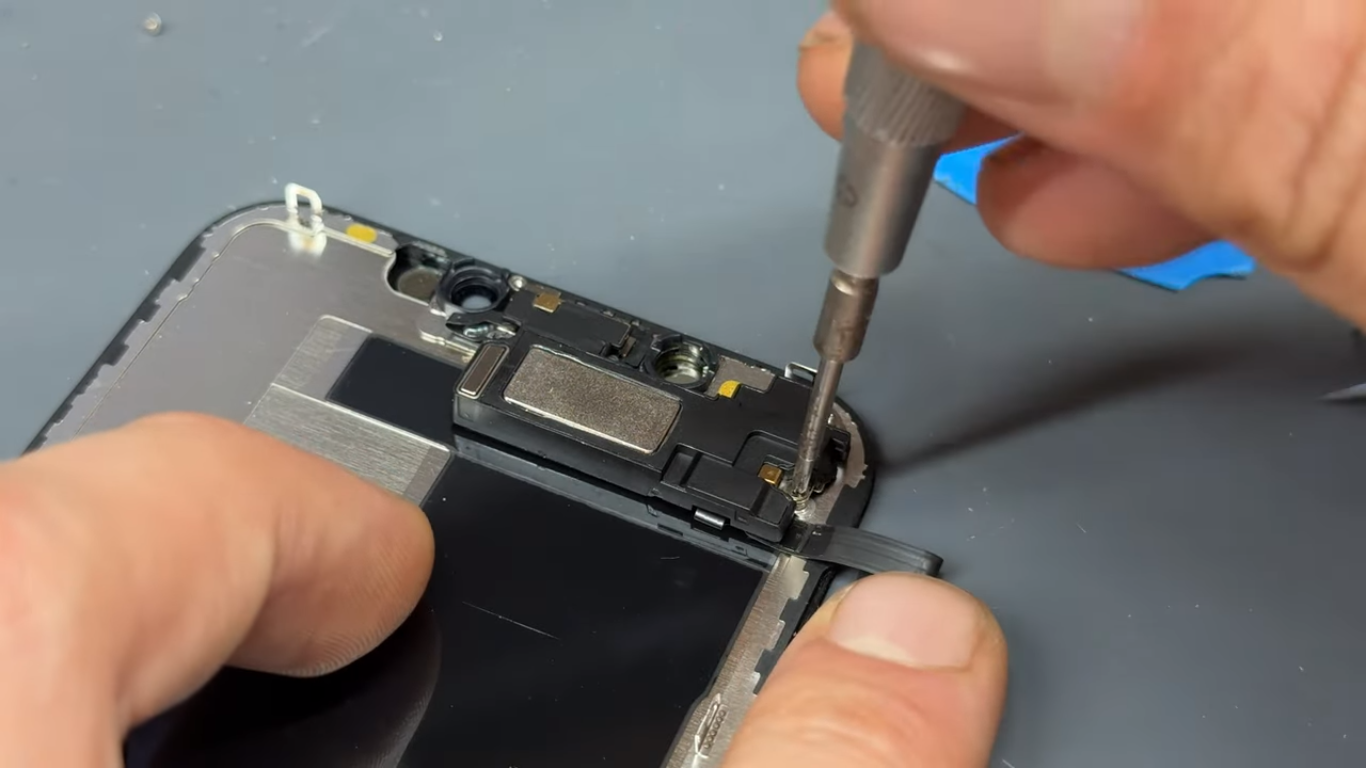
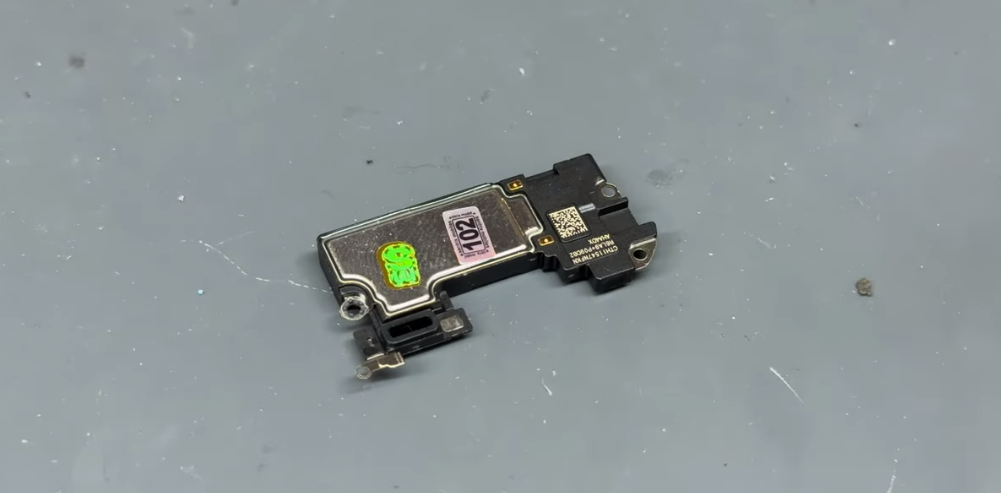
- Unscrew the four 1.4 mm-long screws on the earpiece speaker.
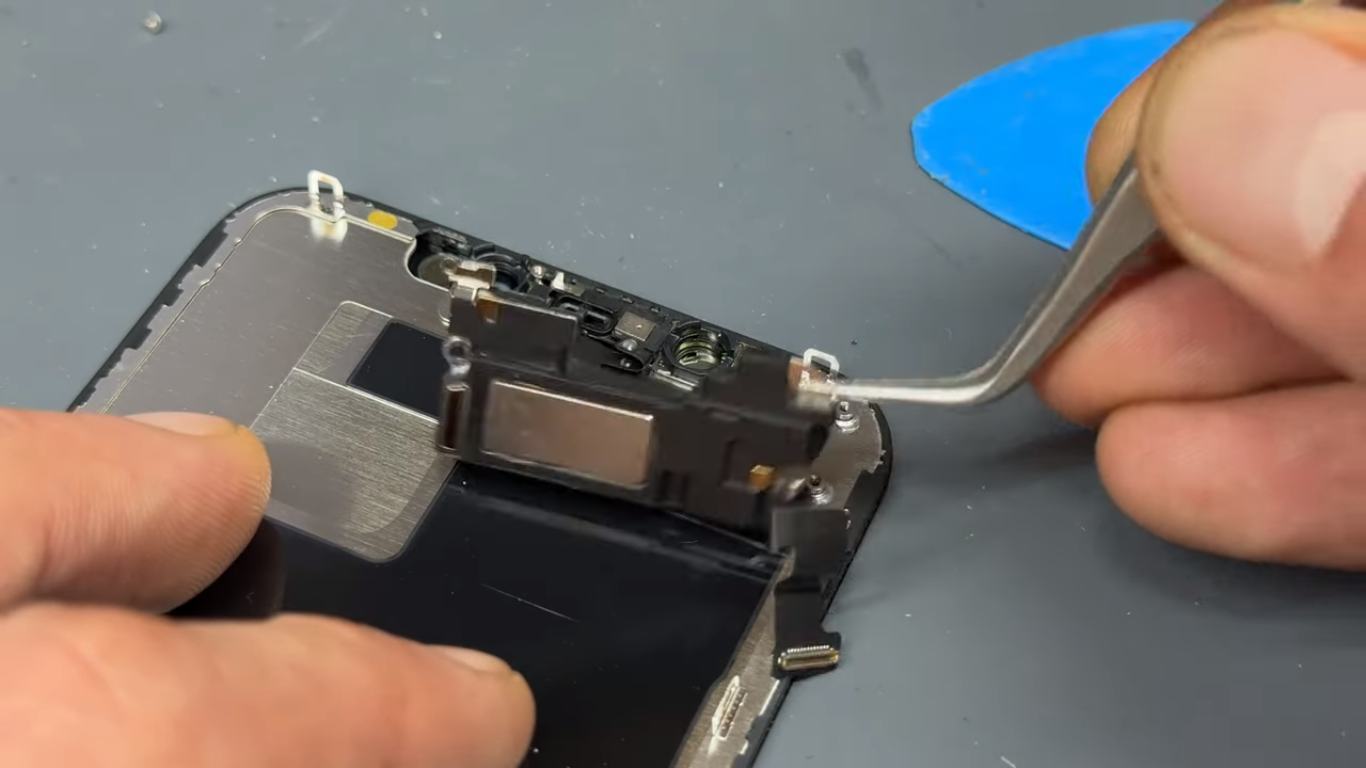
- Remove the ear speaker from its place with the help of tweezers.
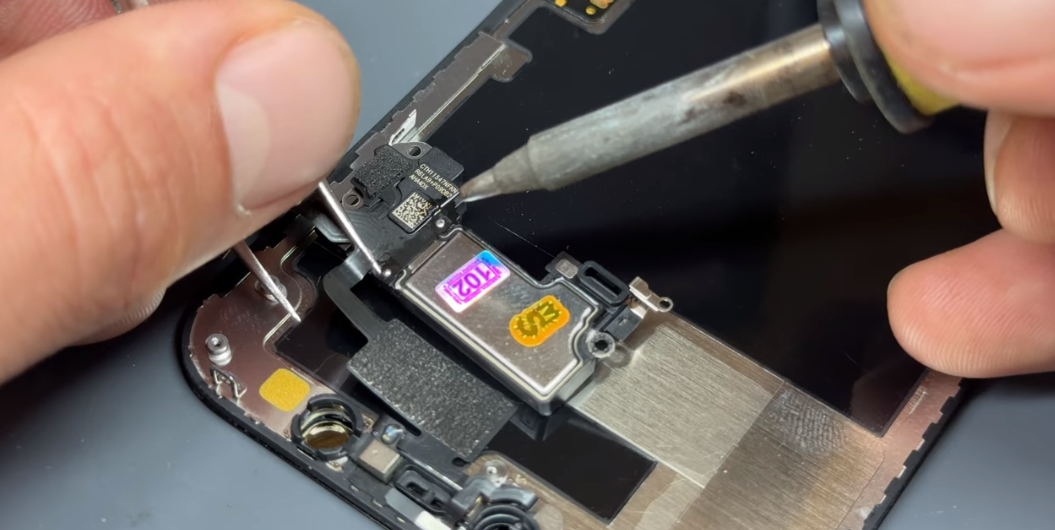
 Step 17: Disconnect The Earpiece Speaker
- Unclip the earpiece speaker press connector.
Step 18: Remove The Ear Speaker
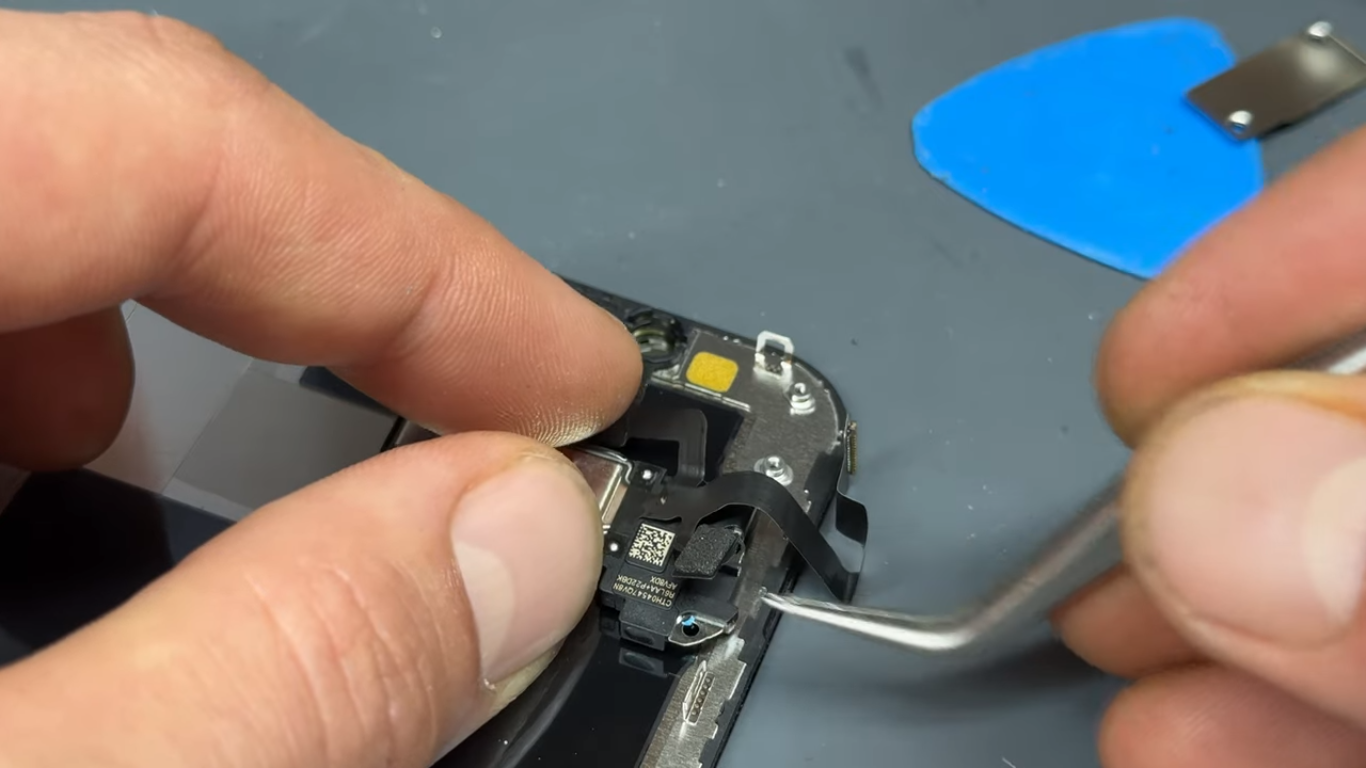
- Hold the earpiece speaker with tweezers or your fingers
- Lift the press connector and remove the earpiece speaker with the help of a soldering iron.
Step 19: Install The New Ear Speaker
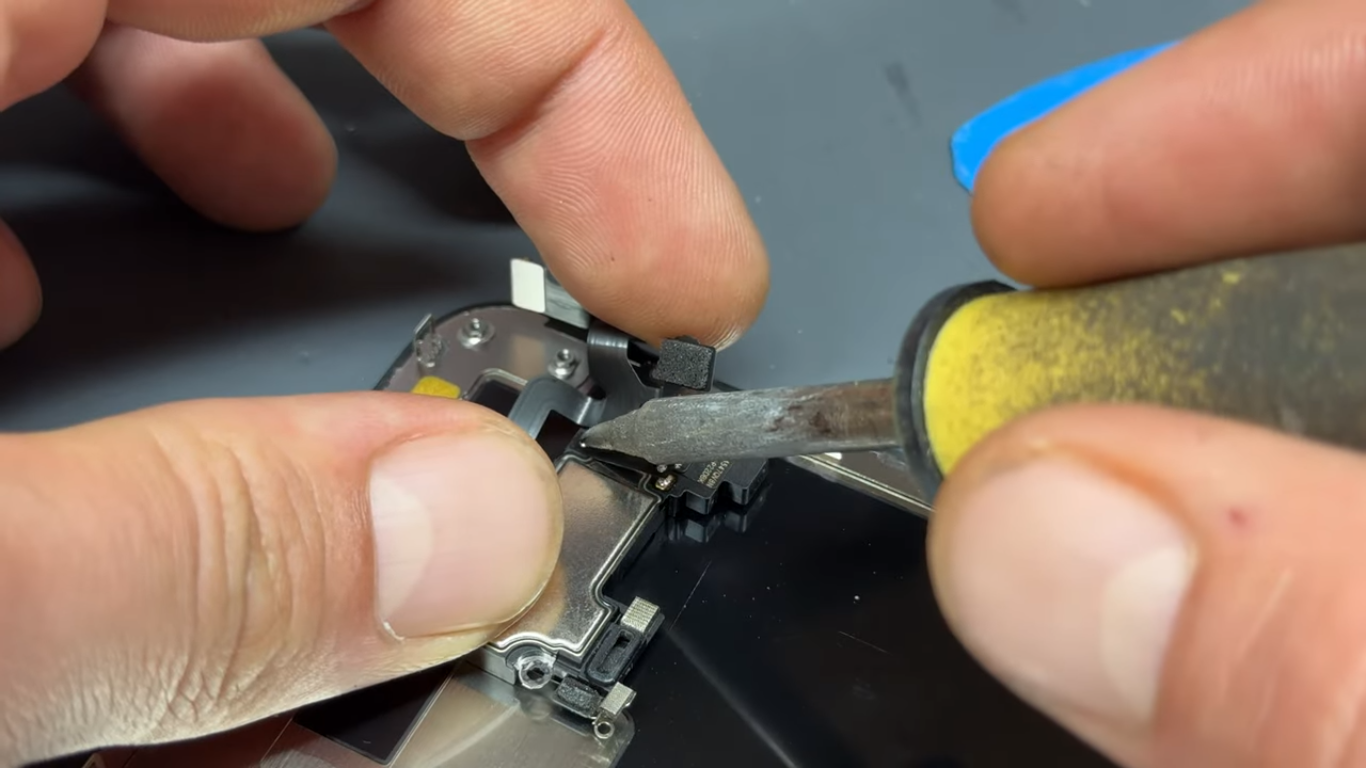
- Install the new earpiece speaker into its place
- Connect the new earpiece speaker with a soldering iron.
- Fasten up its screws.
 Step 20: Reassemble Your iPhone 14
- Dip a cotton bud in Isopropyl alcohol
- Rub this cotton bud around the corners of the back cover and iPhone frame.
- Wait for a few minutes.
- Isopropyl alcohol will soften the old adhesives.
- Wipe away the old adhesive around the edges with a lint-free cotton cloth.
- Reconnect all the press connectors.
- Tighten up all the screws.
- Attach the back glass cover to your iPhone 14 body.
Conclusion
Replacing the ear speaker on your iPhone 14 Pro might initially seem challenging, but with the right tools and careful guidance, it is manageable. This step-by-step guide ensures you can restore your device’s audio functionality without professional help. By following detailed instructions, from marking your opening picks to disconnecting the display cable, and taking necessary precautions, you minimize the risk of damage and ensure a successful repair.
Essential steps like taping over any cracks and heating the corners of your iPhone help facilitate a smoother process. Whether you’re dealing with sound issues or complete audio loss, this guide empowers you to address the problem effectively, ensuring your iPhone 14 Pro performs optimally once more. With patience and attention to detail, you’ll have your device sounding as clear as new.

 Step 17: Disconnect The Earpiece Speaker
 Step 20: Reassemble Your iPhone 14